How to Add USDT to Your Polygon Wallet
Disclaimer
This article was published on October 26, 2021. Please keep in mind that some of the data in this article may be outdated as of today.
Looking to add USDT to your Polygon Wallet, but you’re not quite sure how? This is the article for you! USDT is one of the most stable coins in crypto. As a result, USDT is often held or used for trading/purchasing digital assets such as NFTs. Simply follow the steps below to learn how to get add USDT to your Polygon Wallet.
6 Steps to Add USDT to Your Polygon Wallet
1. Log in to your verified Binance account and buy USDT
Click here to learn how to buy cryptocurrency with a debit/credit card on the Binance app.
Alternatively, click here to learn how to buy cryptocurrency on Binance P2P (App).
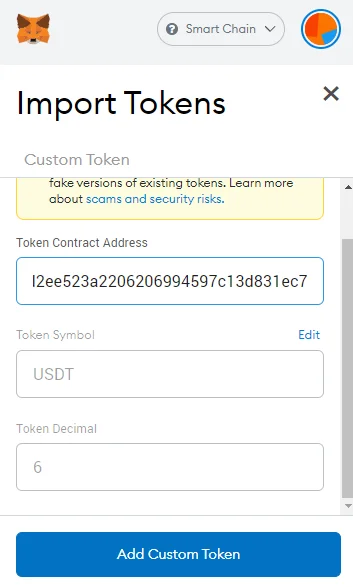
2. Add the USDT token on your Metamask under the BSC Network
Go to your Metamask and click “Import Token” and then “Custom Token.”
Then, paste the USDT contract address: 0xdac17f958d2ee523a2206206994597c13d831ec7 or go to CoinGecko and copy the USDT contract address found on the right hand part of the screen.
Then, click Add Custom Token.
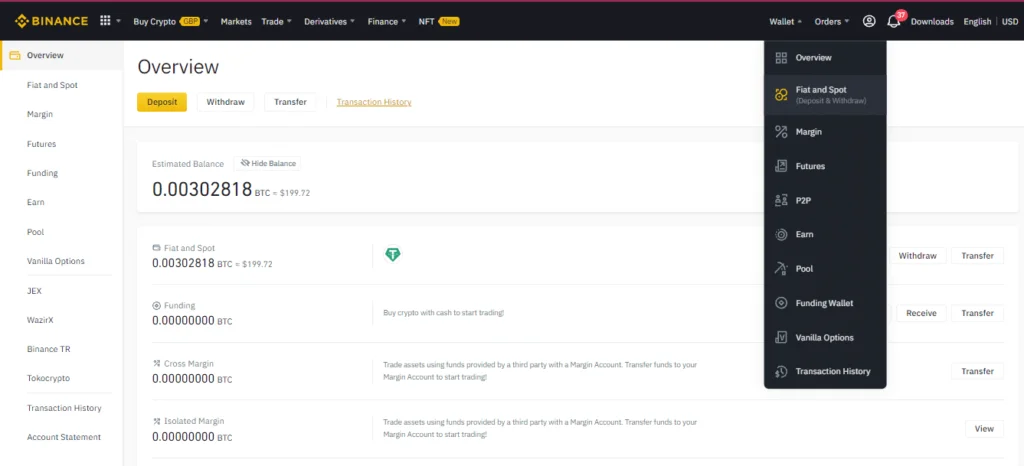
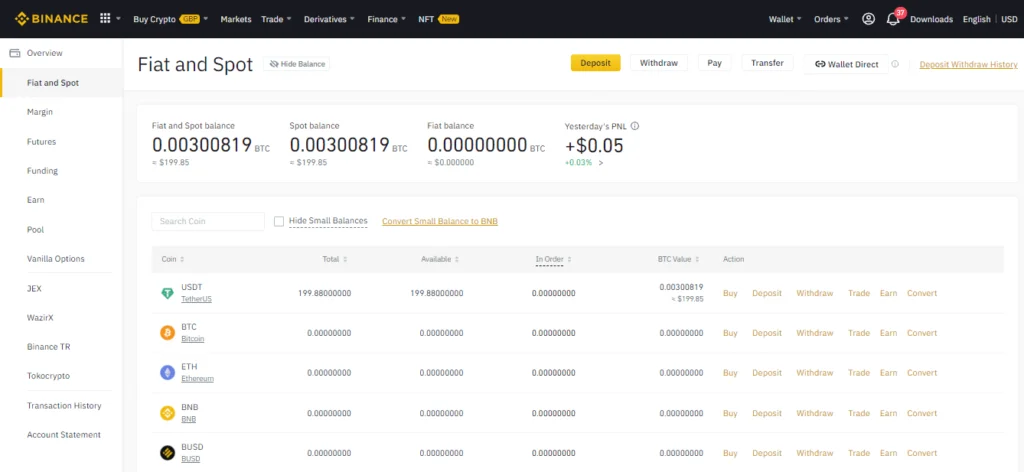
3. From Overview, go to your Wallets and click Fiat and Spot to see your credited USDT
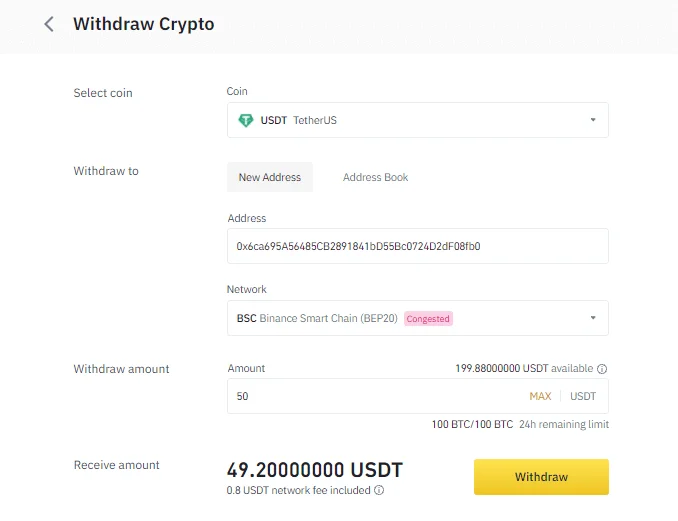
4. Withdraw your USDT from your Binance to Metamask Wallet
To do this:
- Click “Withdraw” alongside your USDT token.
- Copy your BSC address and paste it as a recipient address for your withdrawal.
- Choose BSC Binance Smart Chain (BEP20) for the Network.
- Enter the amount you wish to withdraw, and click “Withdraw.”
- Confirm the transaction, and it will be processed.
Note that this may take 10-15mins to complete.
5. Prepare some BNB tokens for the gas fee
Make sure to have roughly $0.20-$0.30 (PHP10-PHP15) worth of BNB in your Metamask for the gas fee. To do this, withdraw your BNB to your Metamask. If you have no available BNB in Binance, then convert some of your USDT to BNB. Then, click “Withdraw” alongside your BNB tokens and paste your BNB address from Metamask. Proceed with the transaction by clicking “Withdraw.”
6. Bridge your USDT to Polygon using the xPollinate.
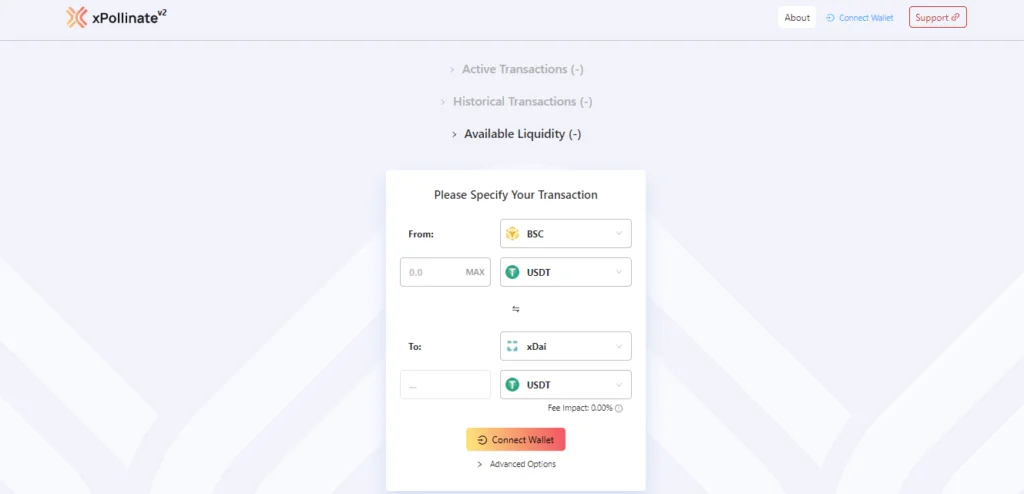
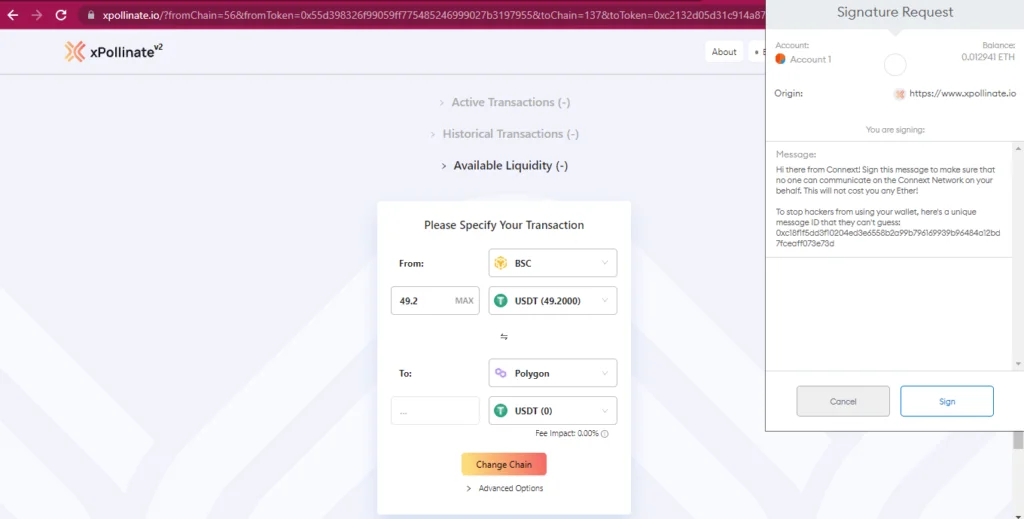
Click on “Connect Wallet,” and your Metamask extension will pop up asking you to sign the connection.
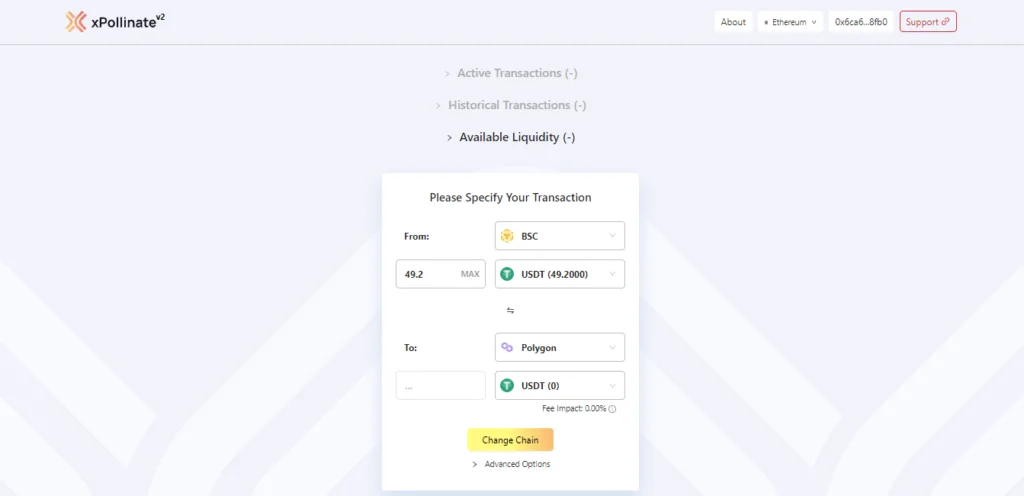
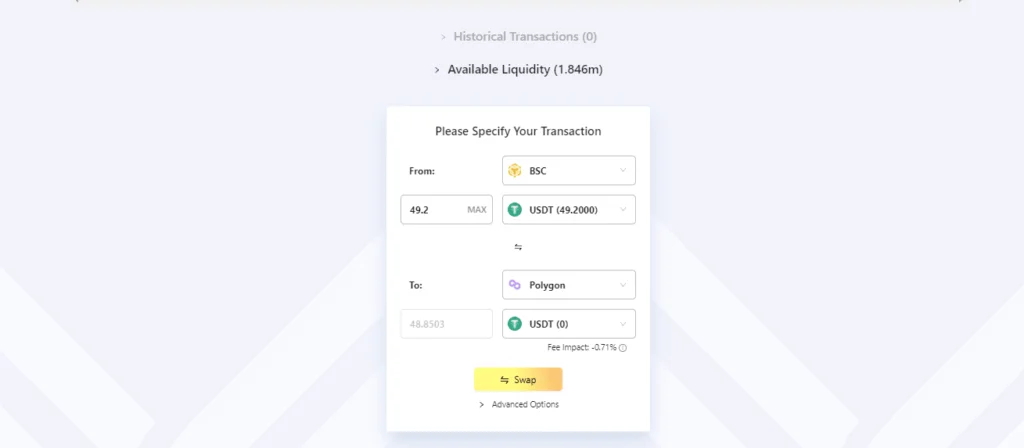
Follow the configurations below. Make sure that you choose USDT for the token, BSC for the “From” Network, and Polygon for the “To” Network. Click “Change Chain.”
Your Metamask Wallet will now ask for you to sign the transaction.
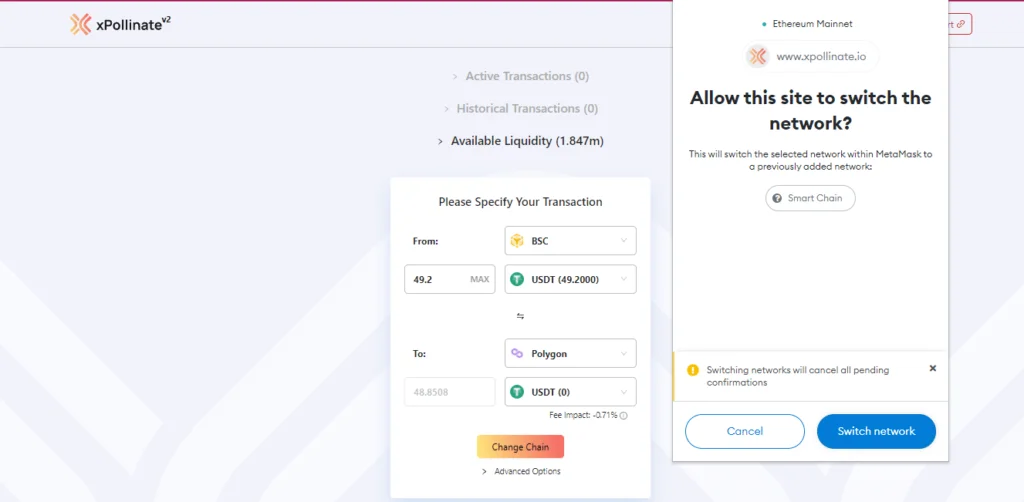
Your Metamask will ask for a confirmation to allow xPollinate to switch the network. Click “Switch Network.”
Click “Swap” and sign the transaction in your Metamask.
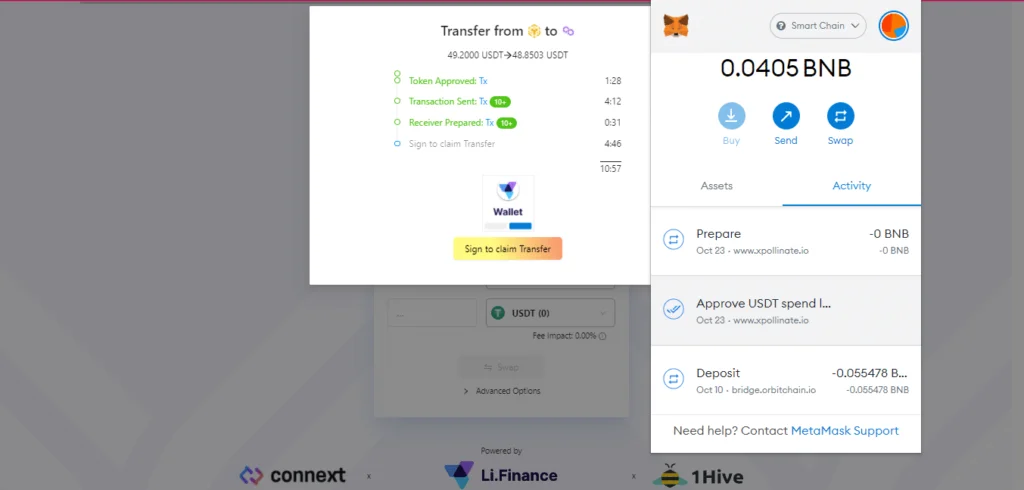
Confirm the transaction and then sign to claim transfer.
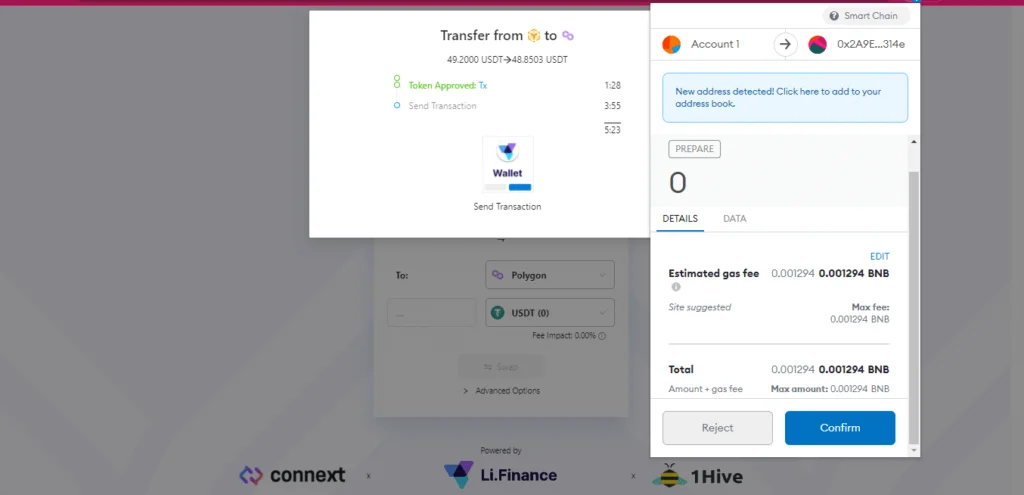
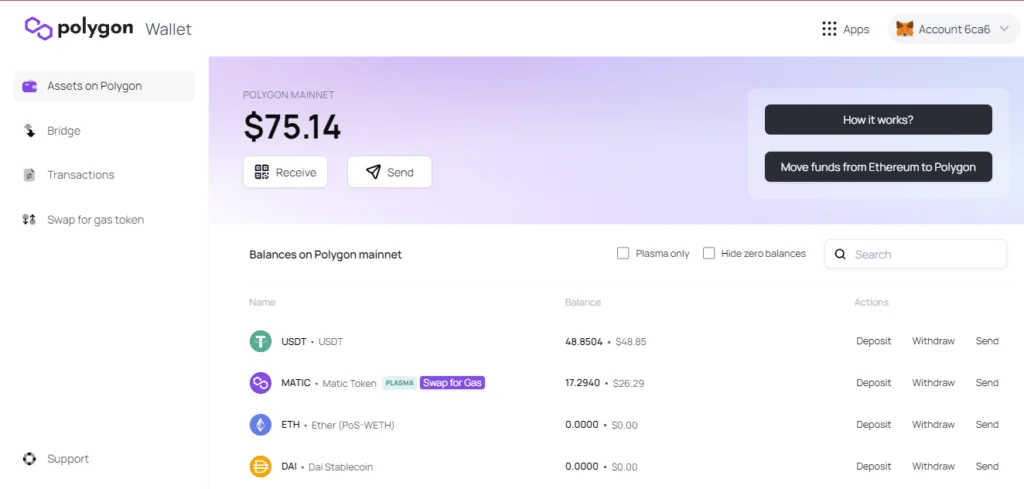
The transaction will be processed. Your USDT from BSC Network will bridge to the Polygon Chain. Please note that you may not see your USDT in your Metamask. However, once you have connected your Metamask to the Polygon Chain, you will see your credited USDT in your Polygon Wallet.
You are now ready to use your USDT in the Polygon Chain! For more tutorials, news, updates, and leaks about play-to-earn games make sure to always check in at P2ENews.com.


