How to Add MATIC Tokens to Your Polygon Wallet When Binance is Suspended
Disclaimer
This article was published on October 18, 2021. Please keep in mind that some of the data in this article may be outdated as of today.
In our previous tutorial, we showed you how to add MATIC tokens to your Polygon Wallet.
The process is as simple as:
- Convert your USDT to MATIC.
- Withdraw your MATIC tokens from Binance to MetaMask.
- Wait for Binance Confirmations.
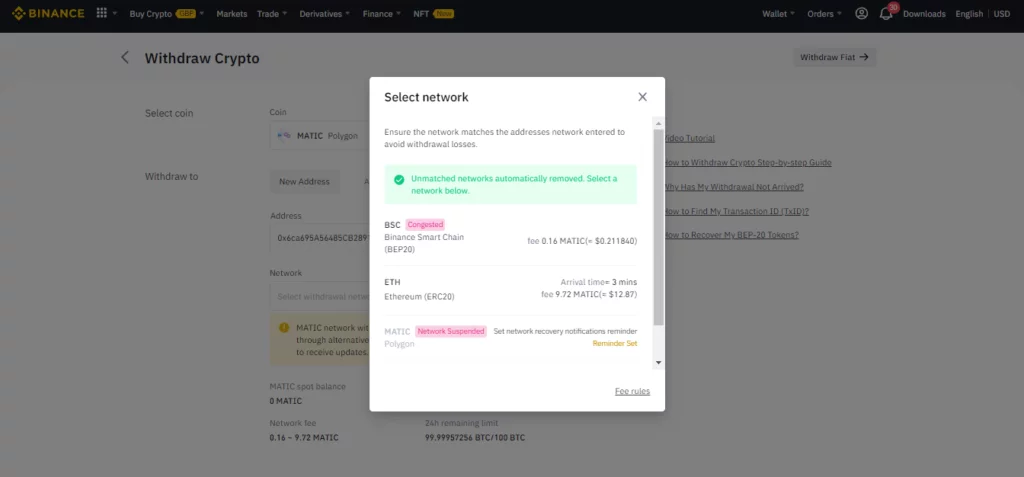
But what if the MATIC Network is suspended in Binance? How can you send MATIC tokens to your Polygon Wallet?
We will answer those questions in this tutorial. Follow these 5 steps and add MATIC tokens in your Polygon Wallet with almost zero gas fees!
Step 1: Convert your MATIC tokens to BNB
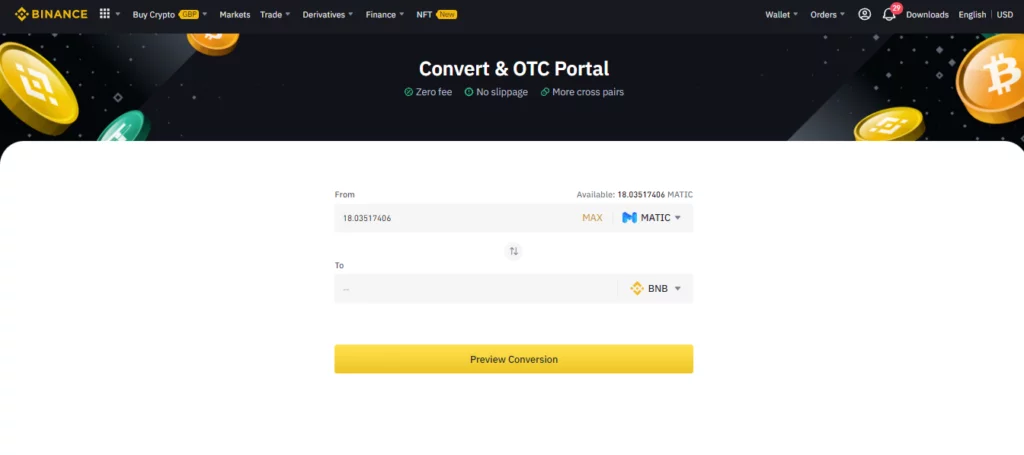
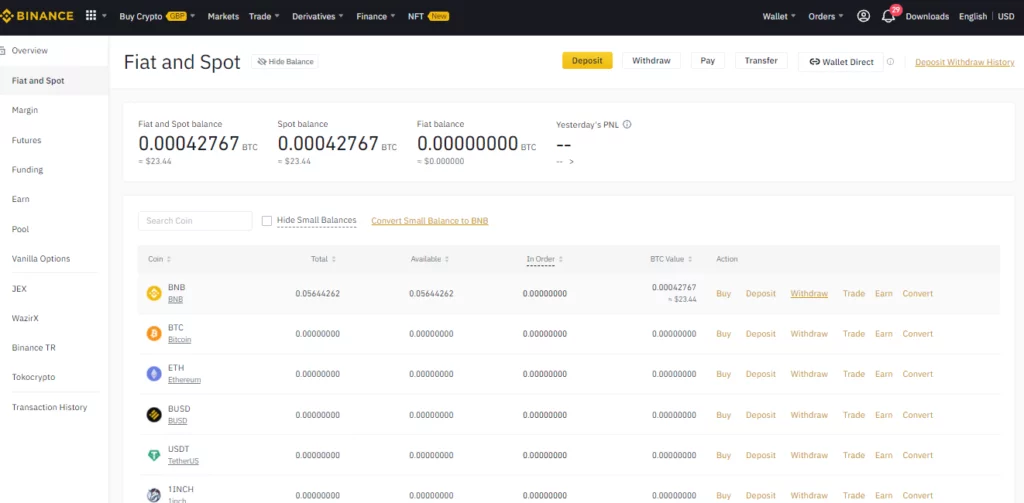
If you have your BNB tokens already then you may ignore this step and proceed to the next. But if you have your MATIC tokens in your Fiat and Spot, click “Convert” and select “MATIC to BNB.”
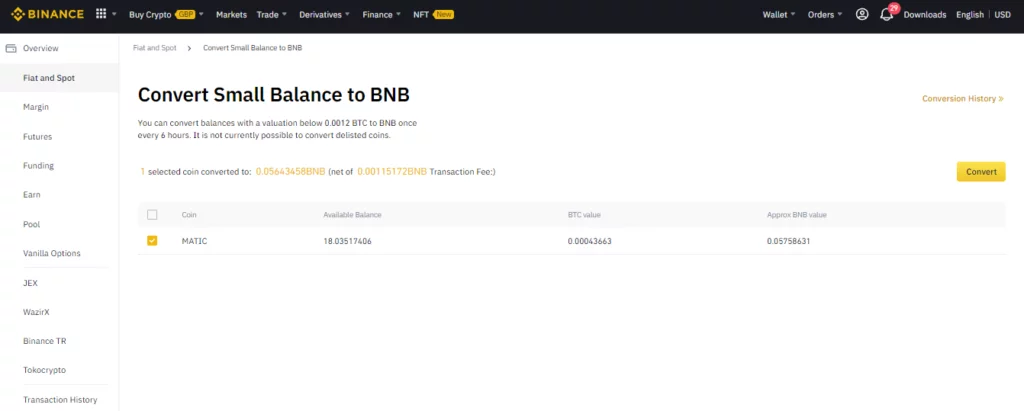
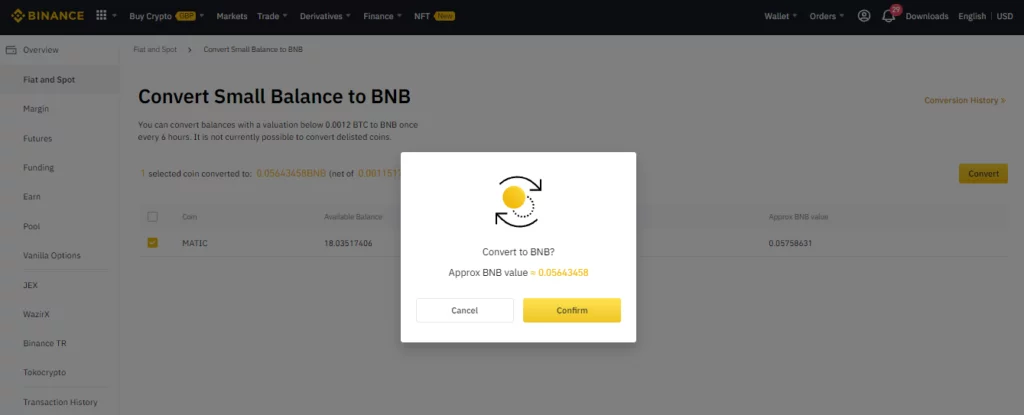
Alternatively, if you’re looking to convert a minor amount of MATIC tokens, under Fiat and Spot you would need to click on “Convert Small Balance to BNB,” select MATIC, hit “Convert,” and then “Confirm.”
Your BNB will show in your Fiat and Spot once confirmed and processed.
Step 2: Send your BNB to your MetaMask Wallet
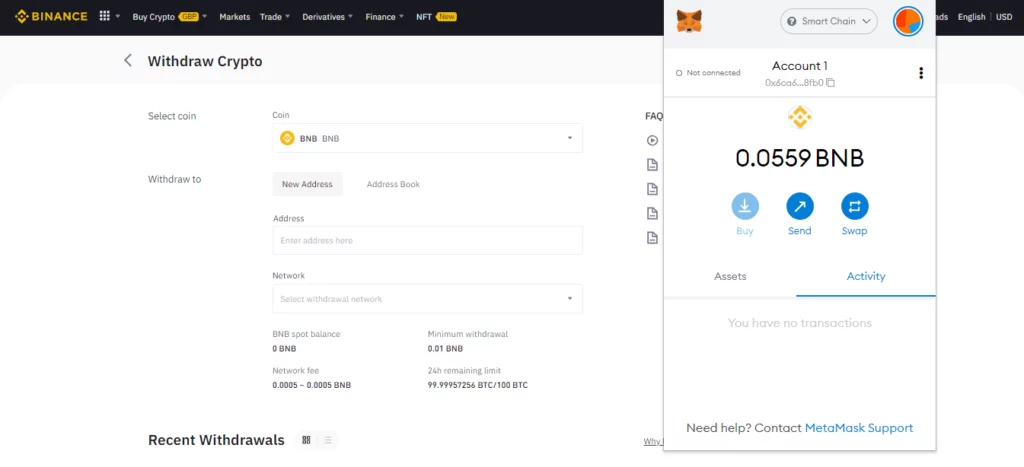
Go to your Fiat and Spot, look for BNB tokens, and click “Withdraw.”
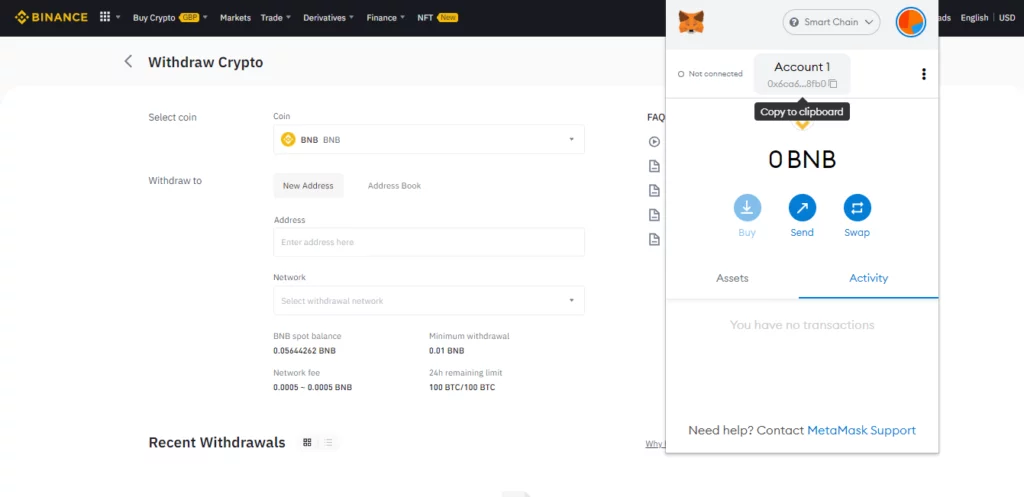
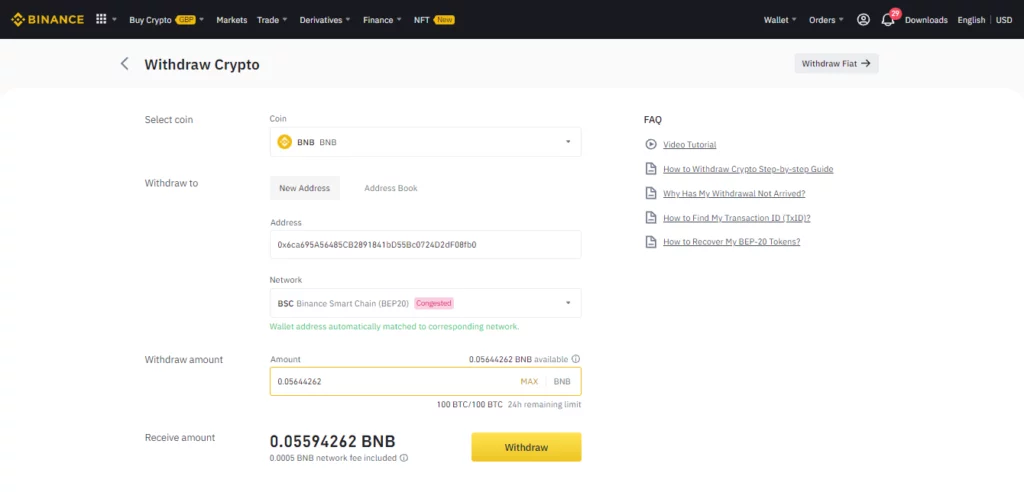
Then, go to your MetaMask, copy your BNB address, and paste it under “Address.” For the “Network,” select “Binance Smart Chain (BEP-20)”. Click “Withdraw.”
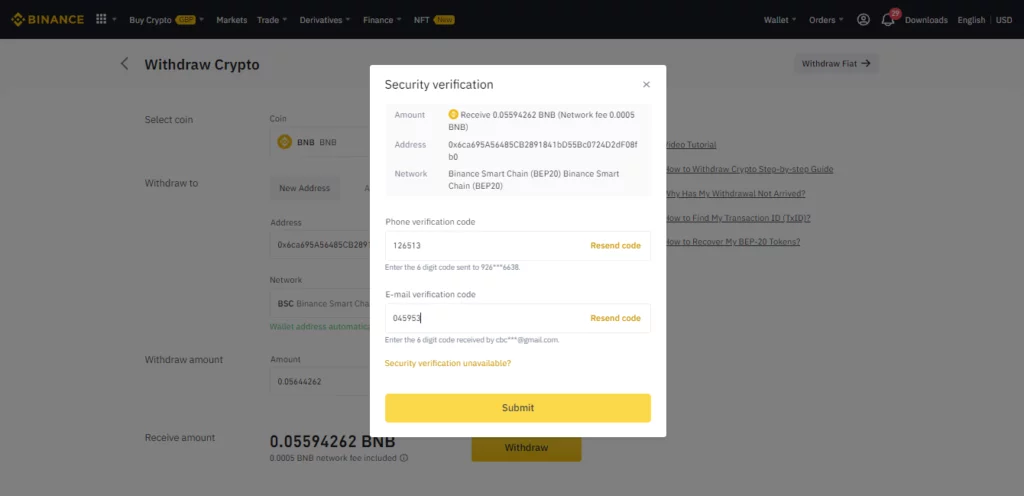
Complete some security verifications and then “Submit.” Note that it will take roughly 1-2 minutes for the BNB to reflect in your MetaMask.
Open your MetaMask to check if the BNB has been credited.
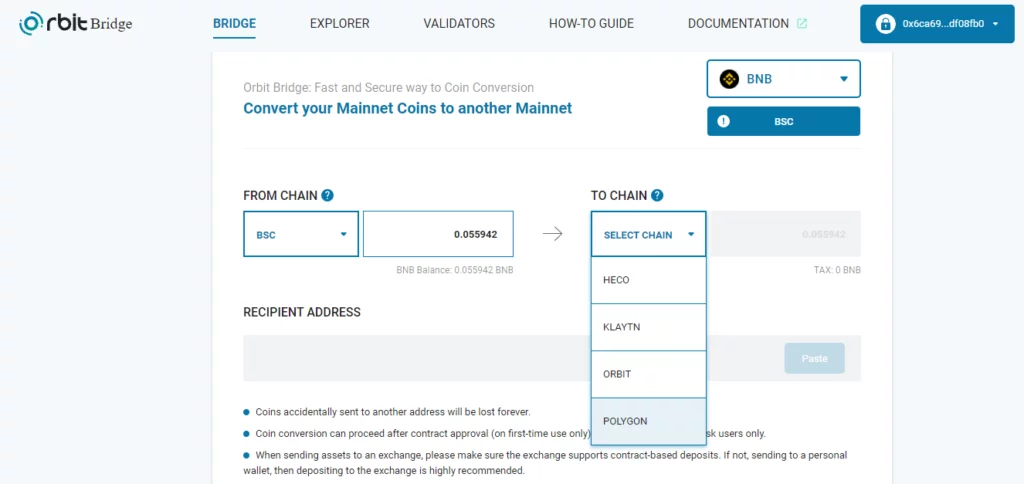
Step 3: Convert your BNB tokens to Matic Mainnet (PBNB) using the Orbit Bridge
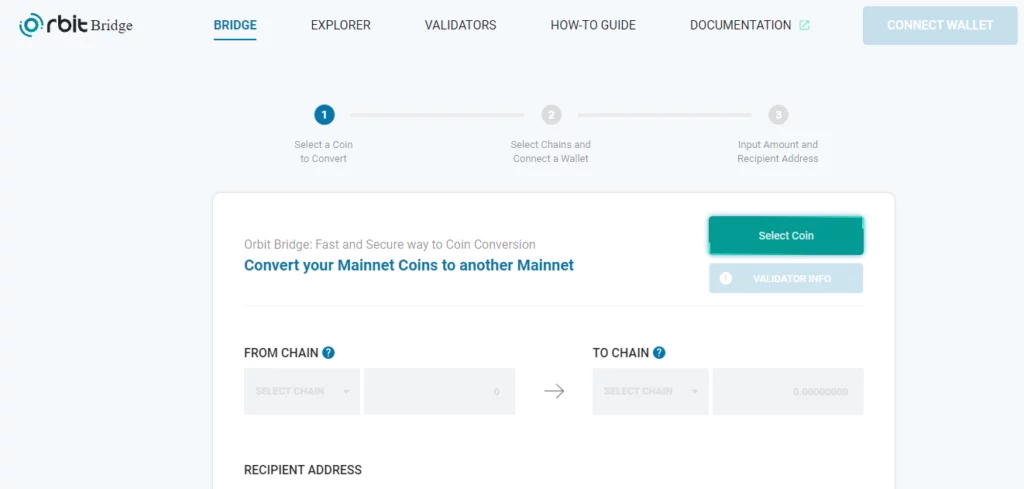
Go to Orbit Bridge here.
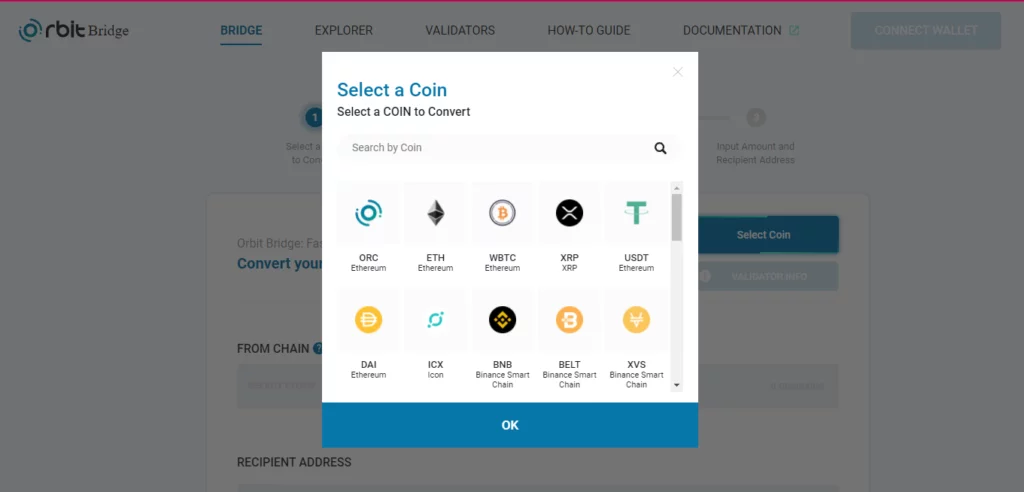
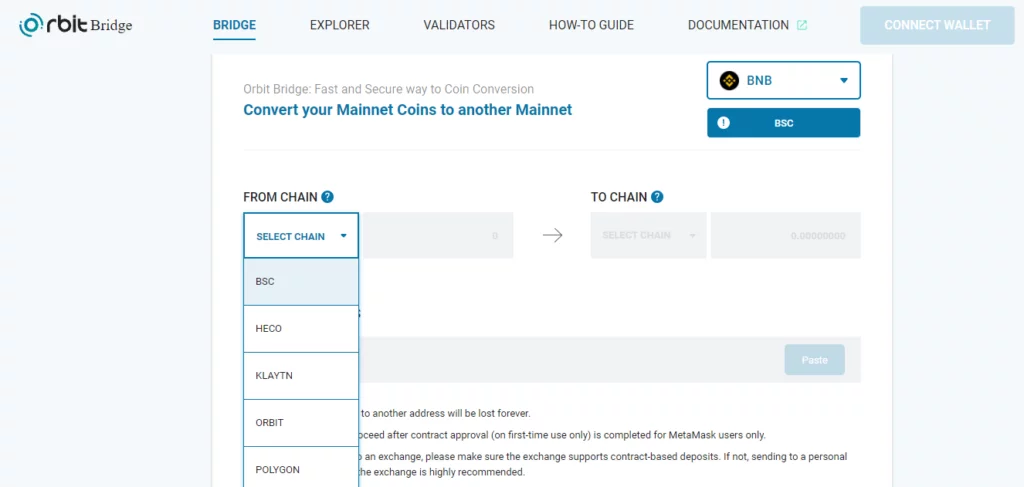
Hit “Select Coin” and choose BNB.
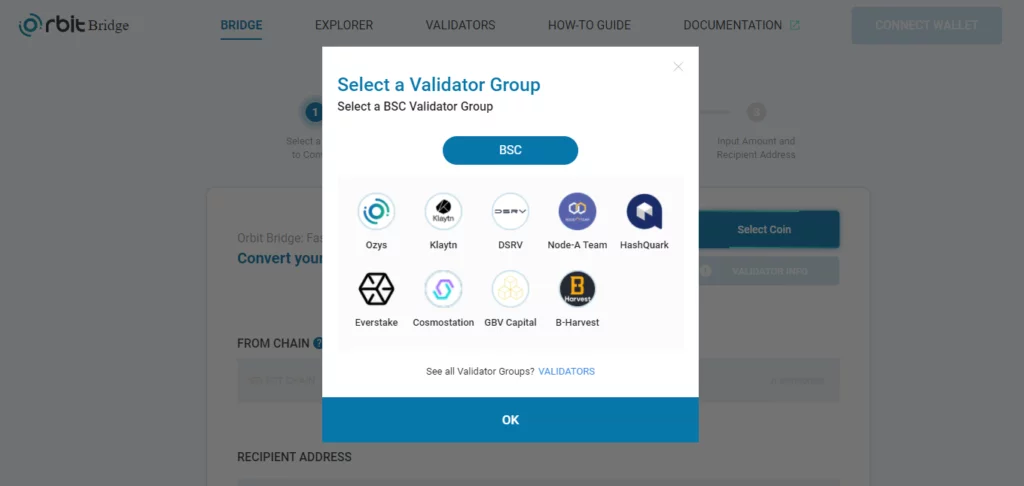
Then, click “BSC” and “OK.”
Select “BSC” from the “From Chain” dropdown.
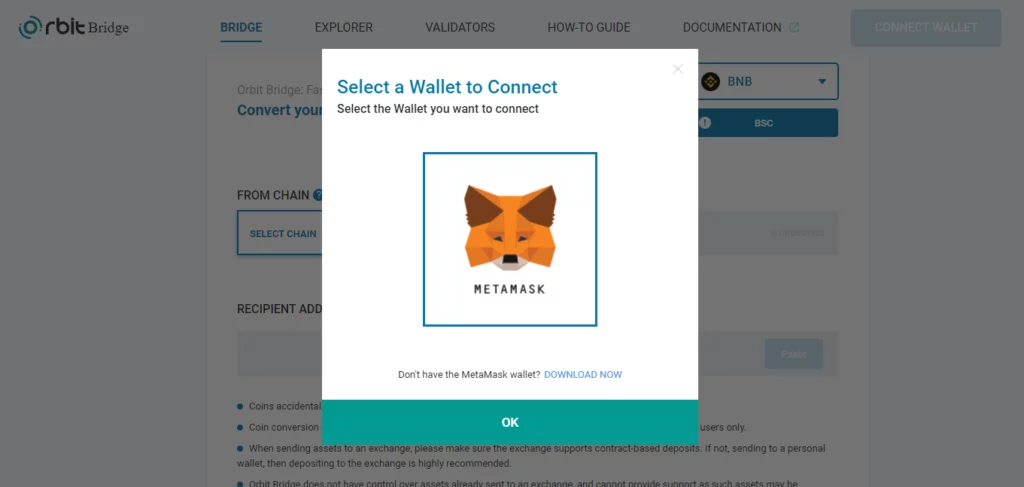
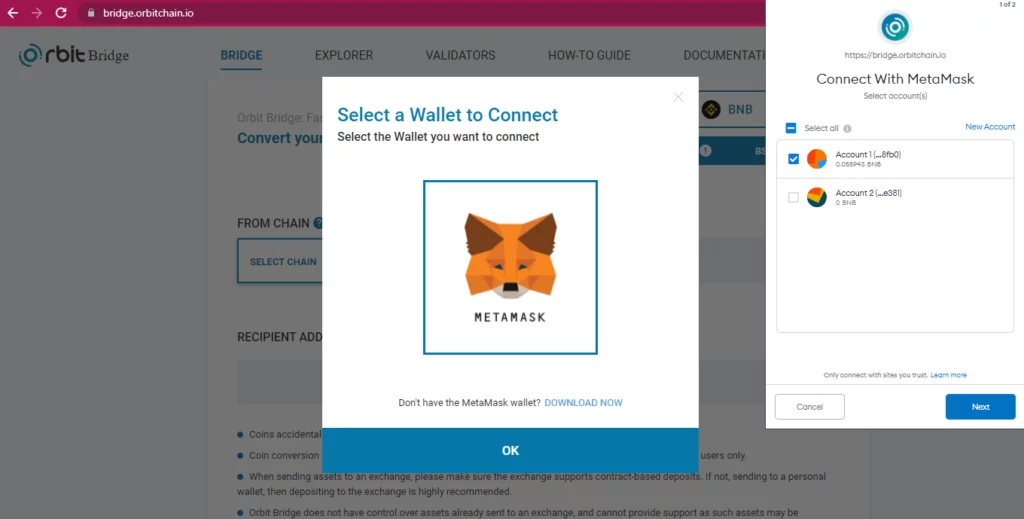
Then you will be asked to connect your MetaMask Wallet.
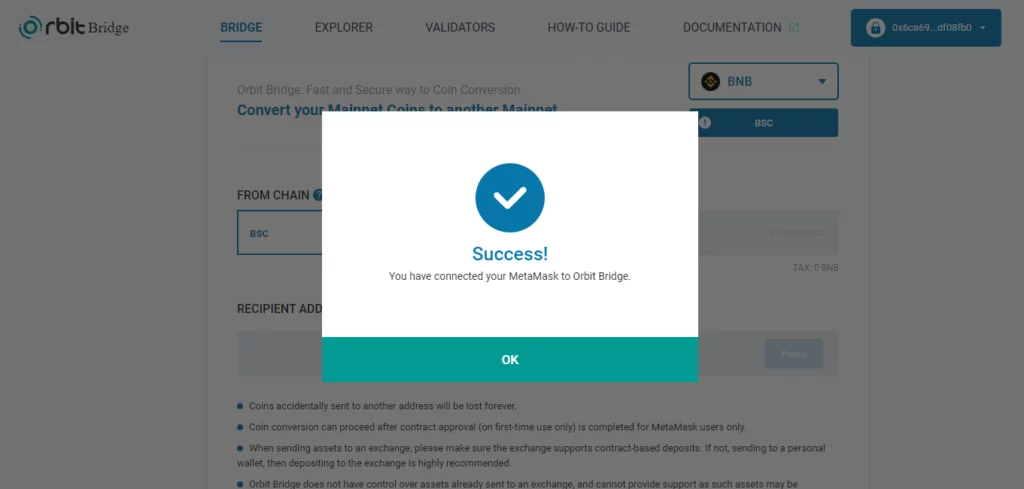
Your MetaMask will pop up. Hit “Next” and then “Connect.”
Once done, enter the amount of BNB you want to transfer to the MATIC Mainnet. For “To Chain,” select “Polygon.”
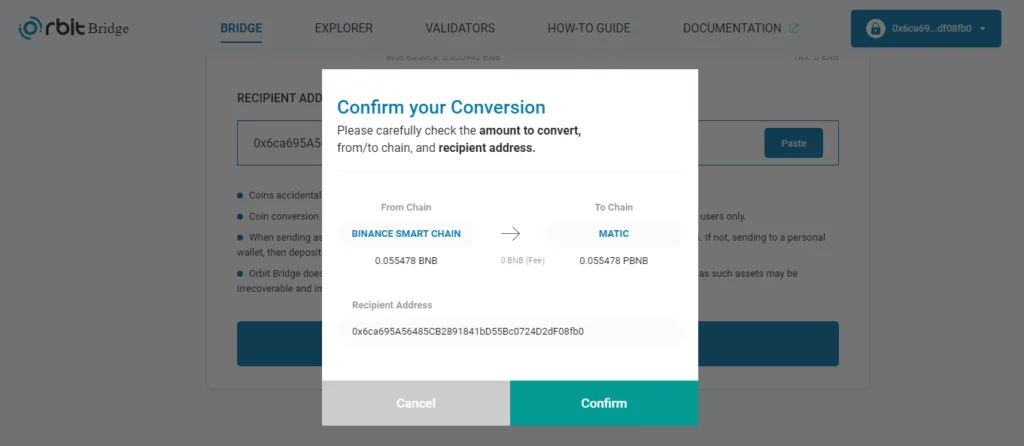
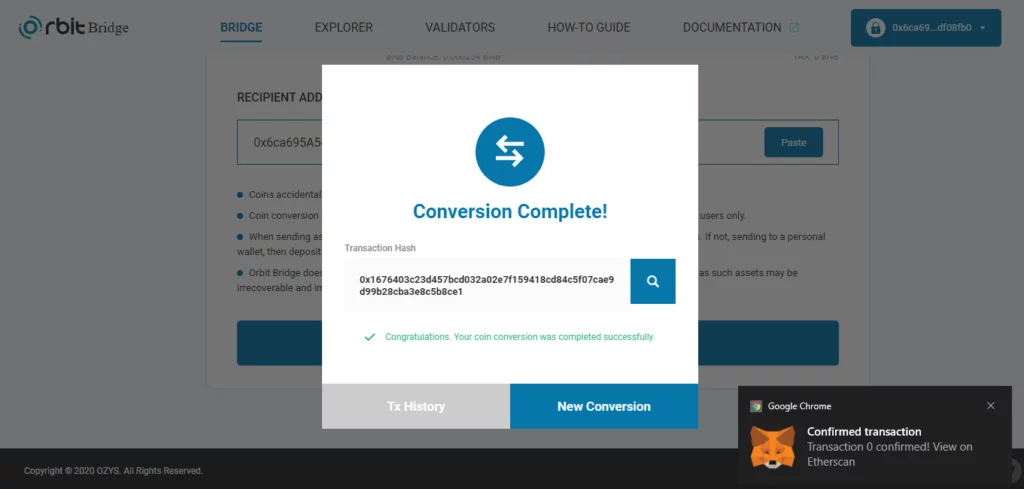
You will see that there is no tax deducted, and the transaction is free! Now paste your BNB address from your MetaMask under the “Recipient Address.” Once done, click “Convert Now” and “Confirm.”
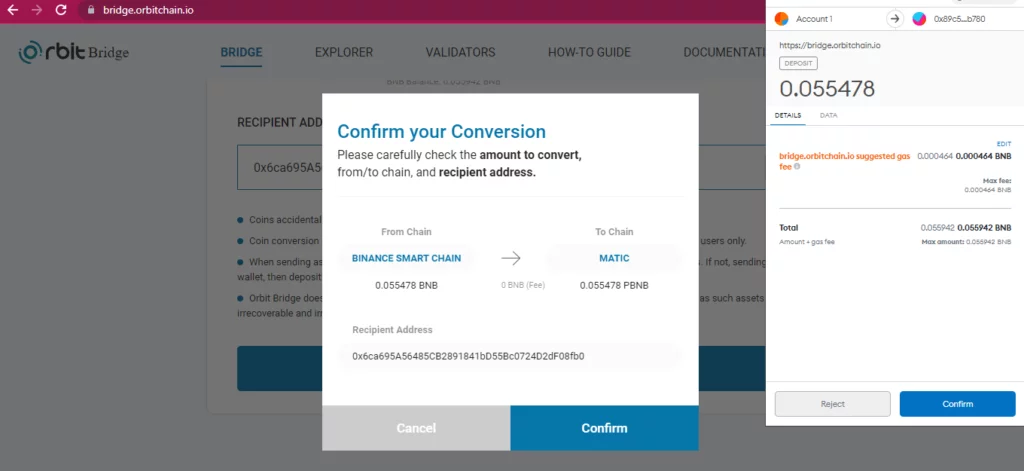
Confirm the transaction in your MetaMask.
Note: If it says “Insufficient fund for gas fee,” subtract the amount of gas fee displayed from your total amount of available BNB (in this example, it shows 0.000464 BNB for gas fee, which is almost $0.20USD). Then set the new BNB amount to convert, and you will be good to go.
Wait a few moments to complete the conversion.
Step 4: Get some FREE MATIC tokens from Polygon Faucet
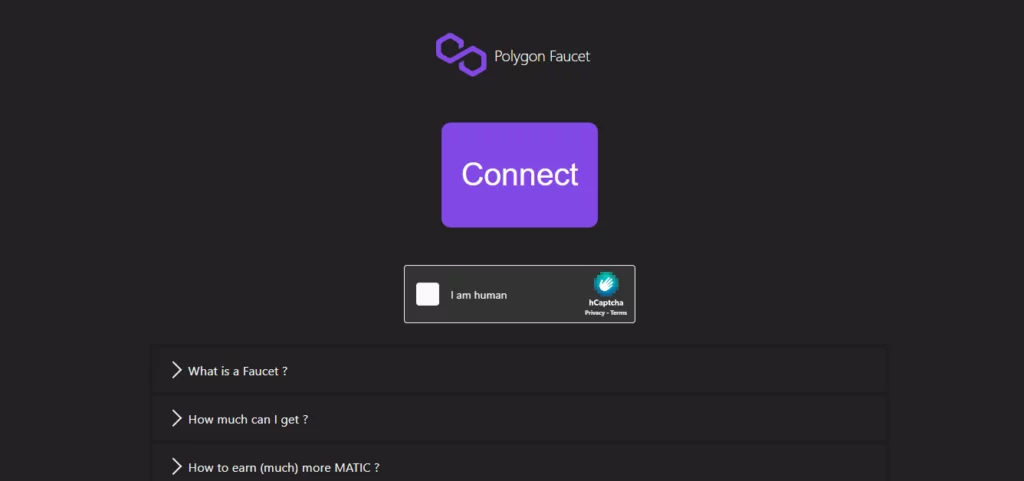
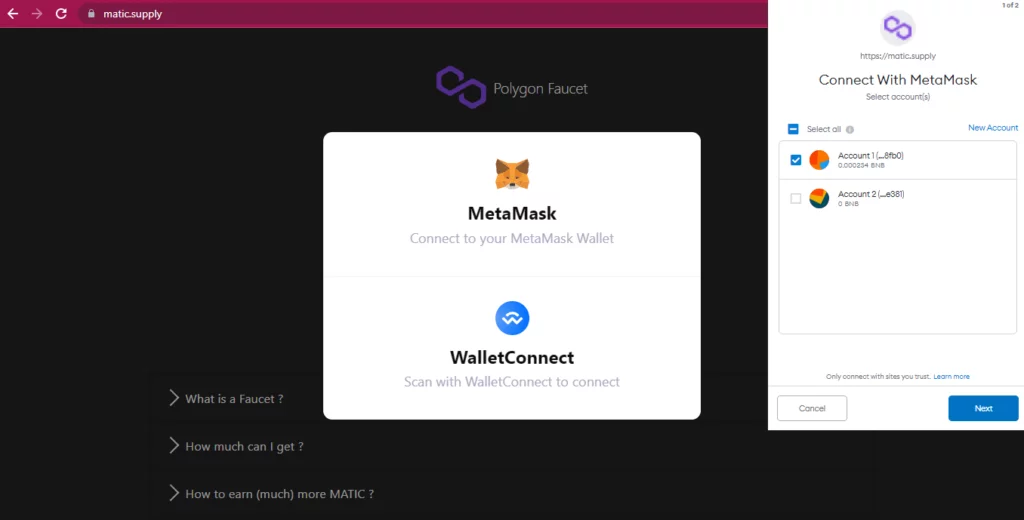
There will be a minor transaction fee, so you will need some MATIC tokens in your MetaMask. To get these MATIC tokens for FREE, go to https://matic.supply/. Then click “Connect.”
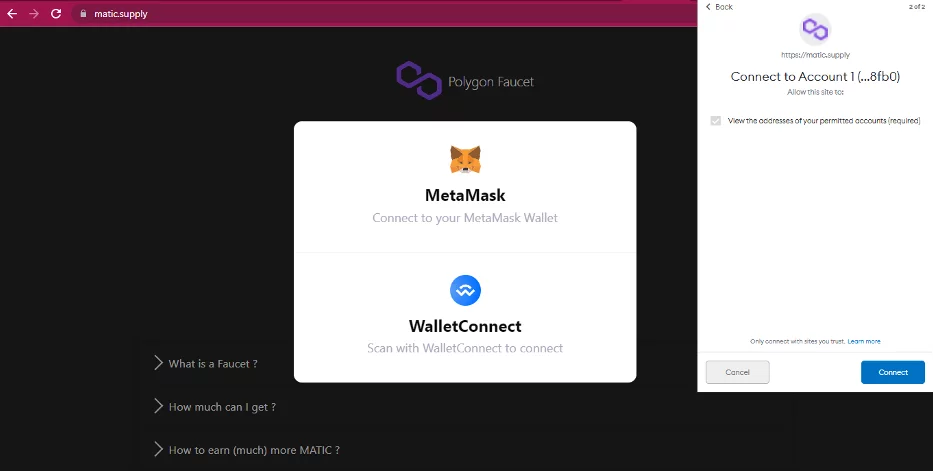
Select MetaMask and make sure that it is set to MATIC Mainnet. Click “Next” and then “Connect.” Polygon Faucet will give you some MATIC tokens for your gas fee when swapping your BNB tokens to MATIC tokens.
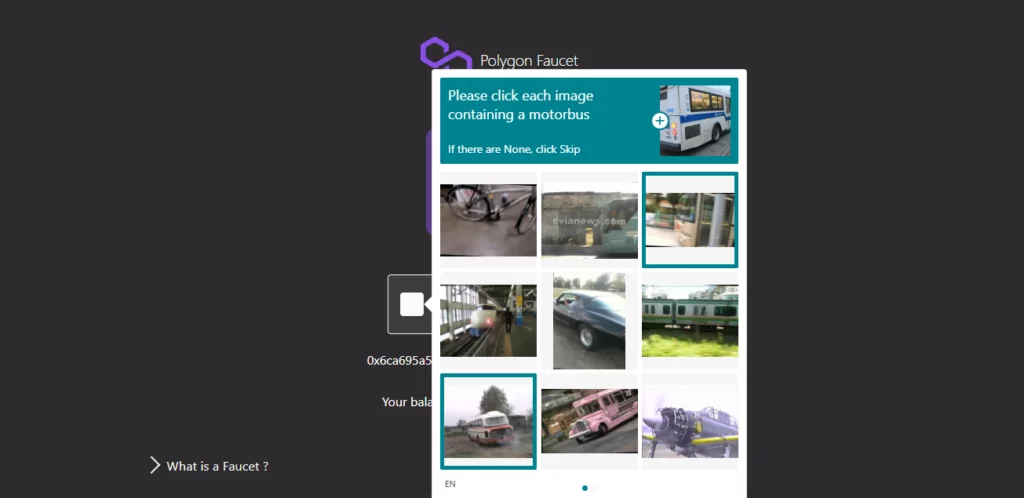
From there, you will need to complete some Captcha challenges.
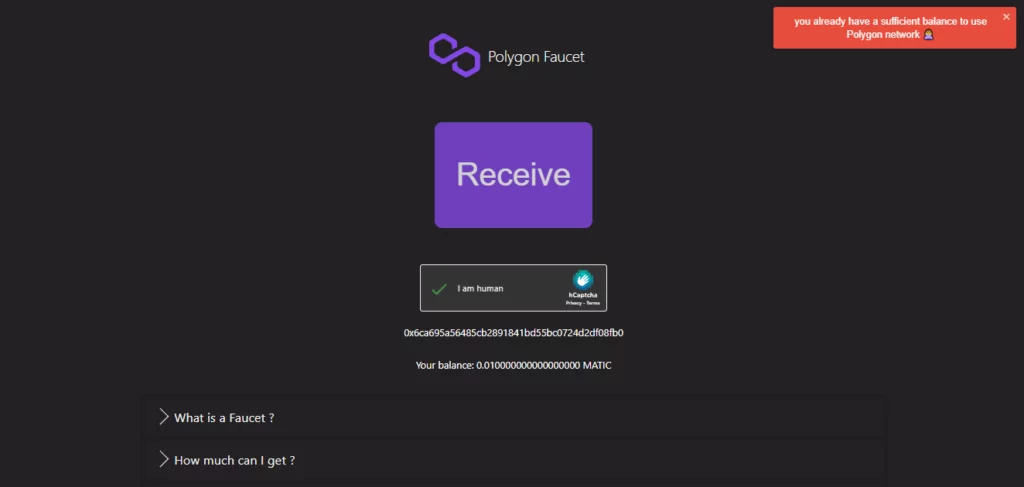
Once done, click “Receive,” and you will receive some free MATIC tokens in your MetaMask.
Tip: Repeat this process in Polygon Faucet up to 3-5 times to ensure that you get enough gas for Step 5.
Step 5: Convert your PBNB to MATIC using Quickswap
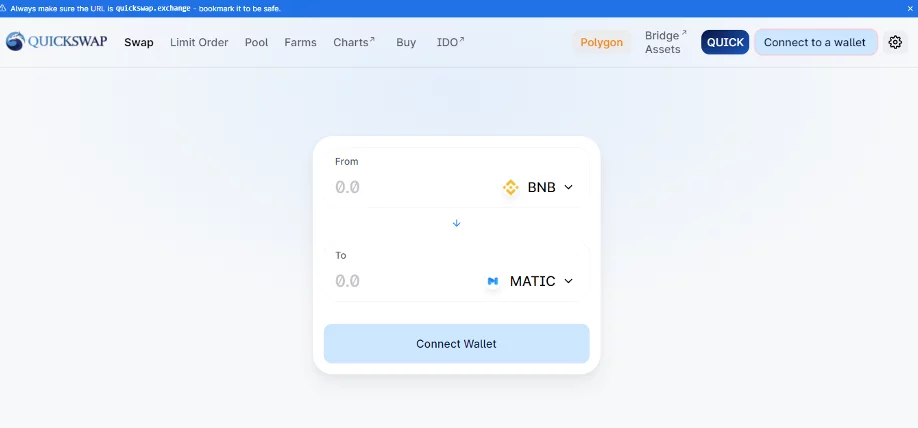
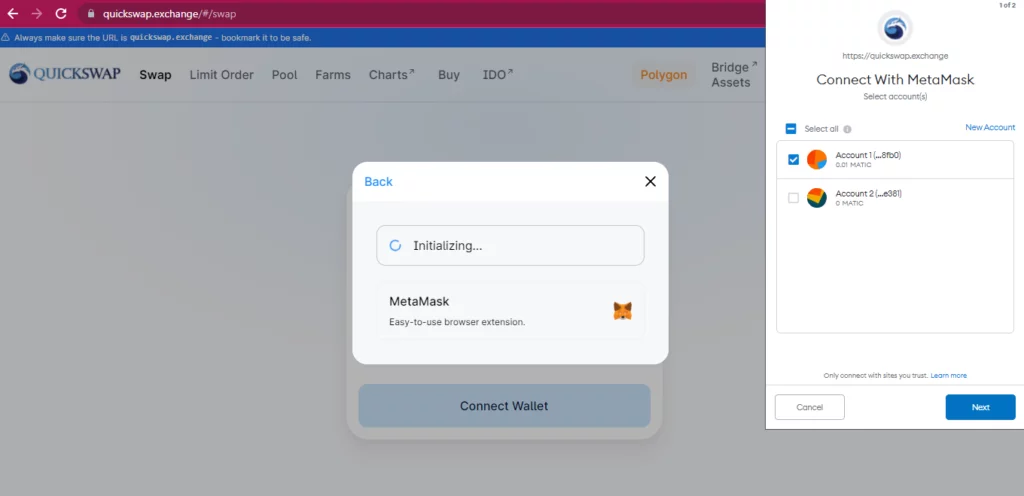
Go to Quickswap and click “Connect to a wallet.” Then select MetaMask.
Click “Next” and then “Connect.”
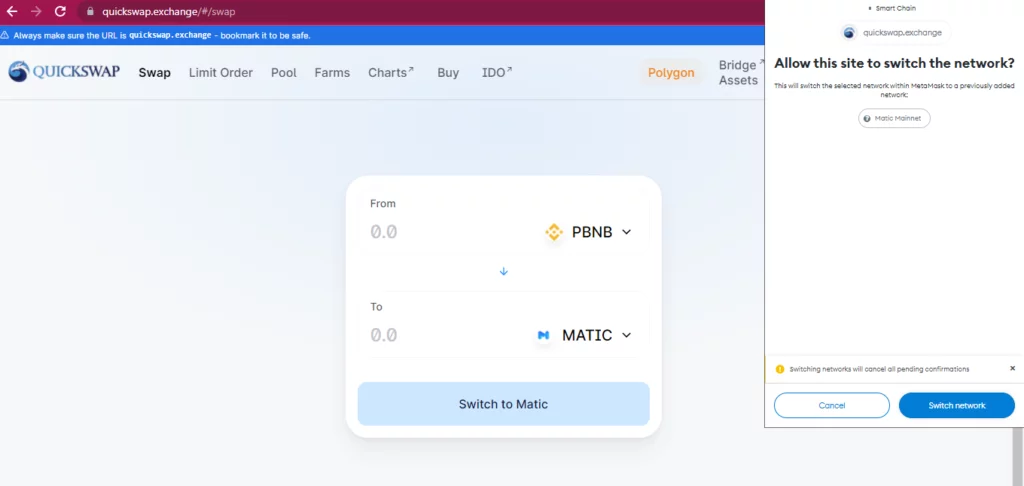
Now that you have connected your Quickswap to MetaMask, you can start converting your BNB tokens to MATIC tokens.
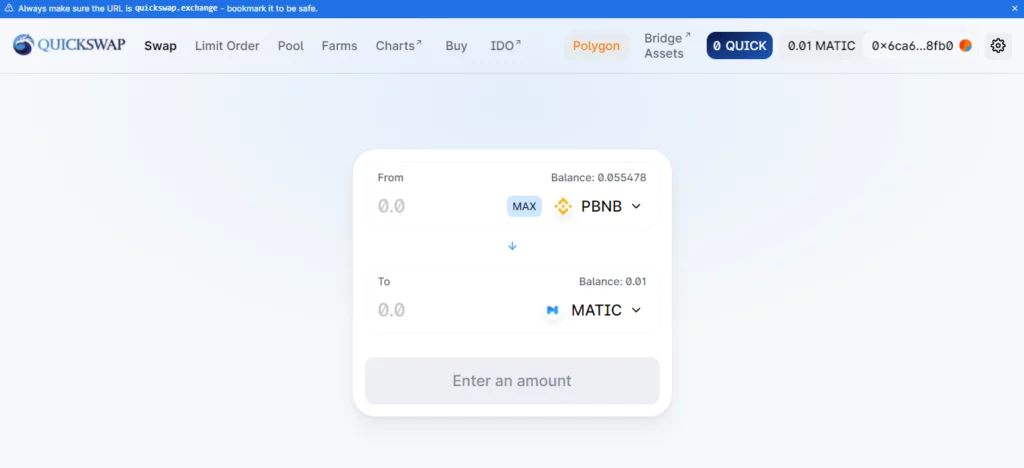
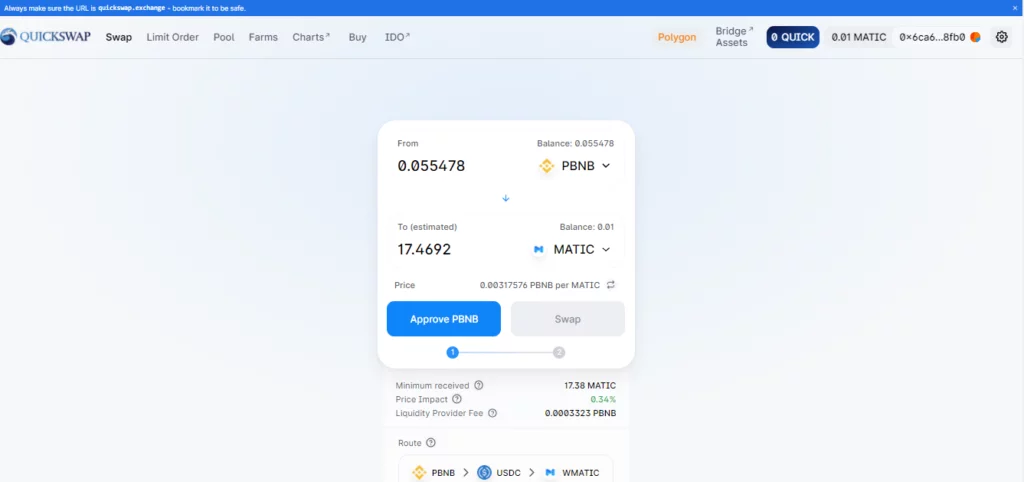
Under “From,” select “PBNB,” and under “To,” choose “MATIC.” Click “Switch to Matic,” and your MetaMask will ask for confirmation. Click “Switch to Network,” and you will see the PBNB tokens you converted earlier using the Orbit Bridge!
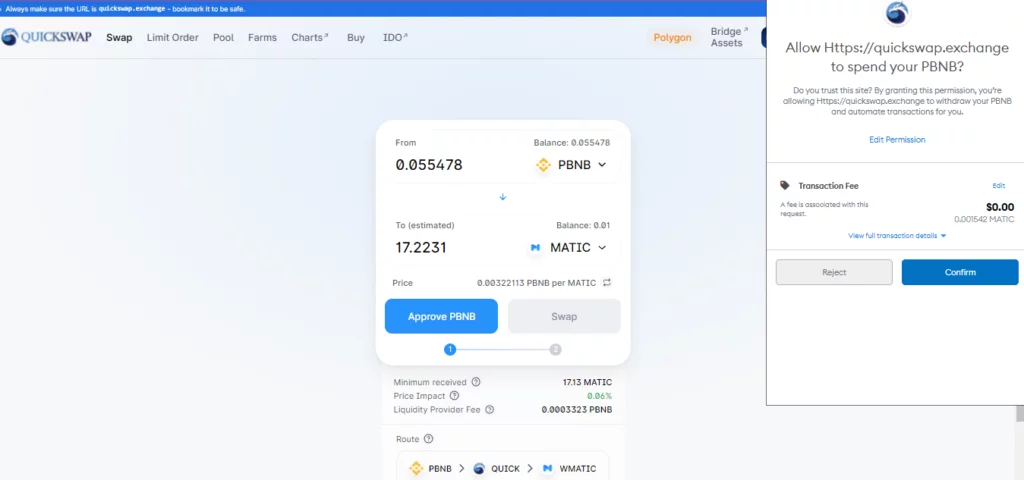
Now click “MAX” and then “Approve PBNB.”
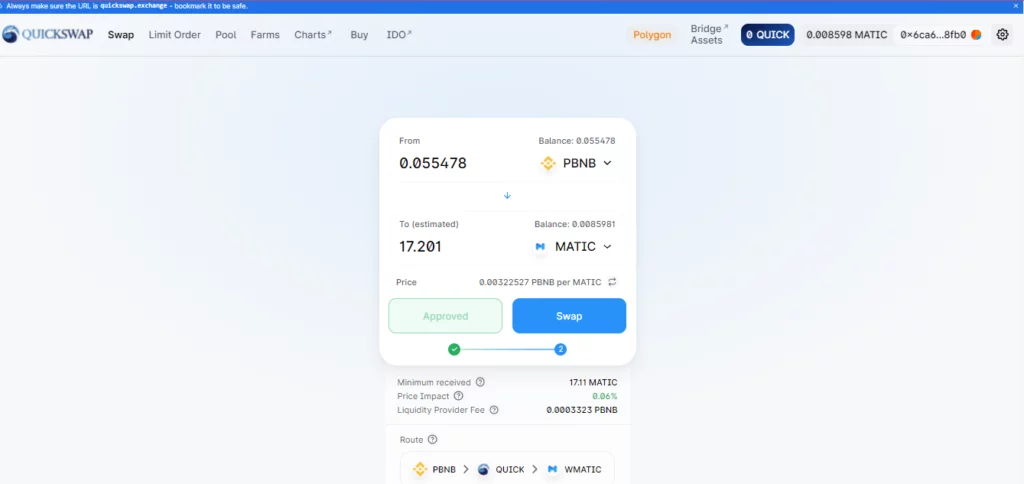
When you click “Approve PBNB,” your MetaMask will pop up, asking you to confirm the transaction to allow Quickswap to spend your PBNB tokens and convert them to MATIC tokens. Hit “Confirm.”
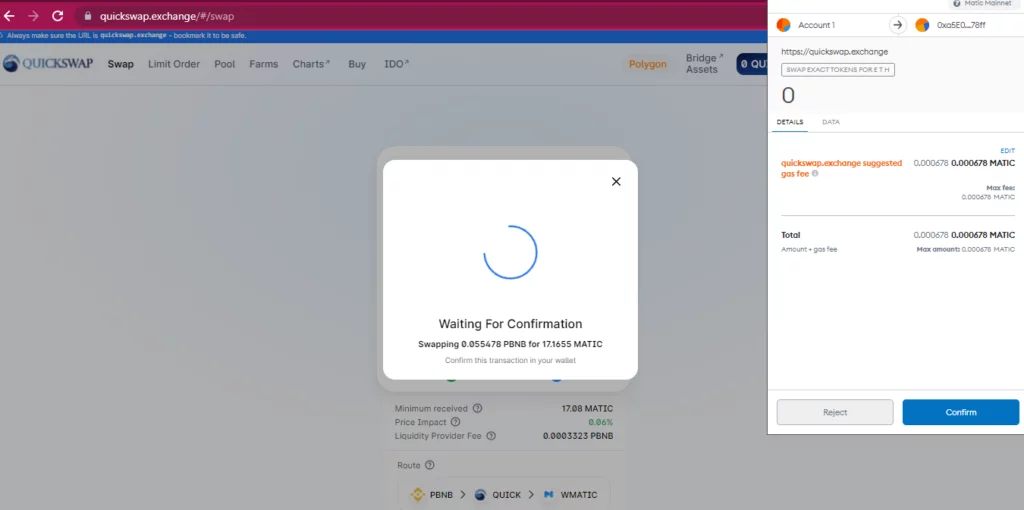
Once you have approved the PBNB, you may now click the button “Swap” to convert your PBNP to MATIC.
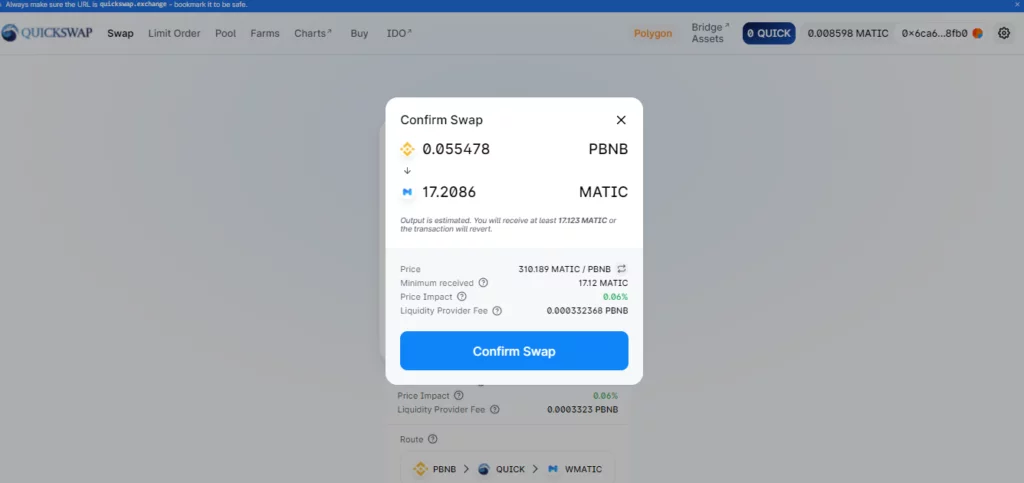
Click “Confirm Swap,” and your MetaMask will pop up again asking for confirmation.
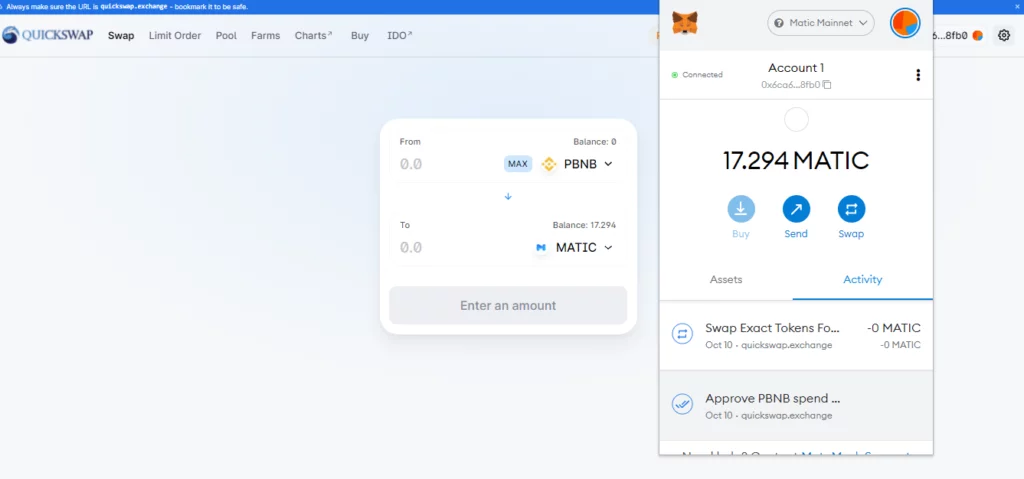
Click “Confirm,” and you will submit the transaction! “Pending” will appear on your screen. The transaction will take approximately 10 minutes to finish.
Check your MetaMask to see that your MATIC tokens are now credited!
That’s it, and you will spend close to nothing throughout the entire process! This is an alternative way to add MATIC tokens to your Polygon Wallet when the MATIC Mainnet is suspended in Binance.
For more tutorials, news, leaks, and updates about your favorite play-to-earn game make sure to always check in at P2ENews.com and follow our social media.


