Complete My DeFi Pet Starter Guide + How to Play
Disclaimer
This article was published on July 23, 2021. Please keep in mind that some of the data in this article may be outdated as of today.
My DeFi Pet recently ranked as the #1 trending token for the past 7 days in Asia. For those part of the rapidly growing crowd interested in the game, this article will give you a clear guide on how to get started in My DeFi Pet.
But before we jump into the step-by-step guide, let us first answer the frequently asked questions about the game.
What is My Defi Pet?
My DeFi Pet (MDF) is a trending blockchain-powered virtual pet game that combines DeFi (decentralized finance), collectibles and charm! The name encompasses the three characteristics of the game: “My” personalization, “DeFi” features integrated, and “Pet” raising game.
How to download My DeFi Pet?
My Defi Pet is currently a desktop/mobile browser game only (read further to learn more).
How to become a Scholar?
For now, there are NO scholarships or managers in My DeFi Pet, unlike Axie Infinity. Here are the reasons:
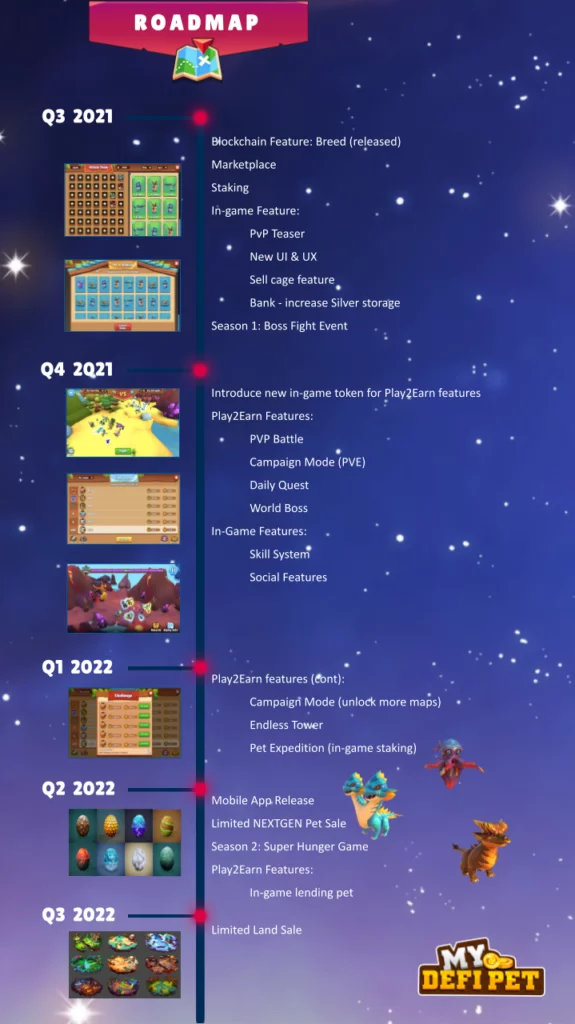
- The play-to-earn mechanics of the game are yet to be released. This is due in Q4 of 2021 (October-December).
- MDP pets are far more affordable than Axies. The base amount of pets required to play the game is 3. As of today, buying 3 MDP pets would cost around PHP2,520 ($50.04), while 3 Axies would put you out by PHP75,000-PHP100,000 (USD1,489.20-USD1,985.60) for a good team.
Is it possible for the game to have Scholarship Programs in the future?
There have been no official statements from the MDP team in regards to this, and it does not appear on their official game-roadmap. However the upcoming play-to-earn mechanics of the game is said to be on schedule and will be introduced to the game in Q4 of 2021.
Buying DPETs
You will need the following fundamentals before you proceed to buy DPETs (token) which will be used to purchase eggs on My DeFi Pet official website.
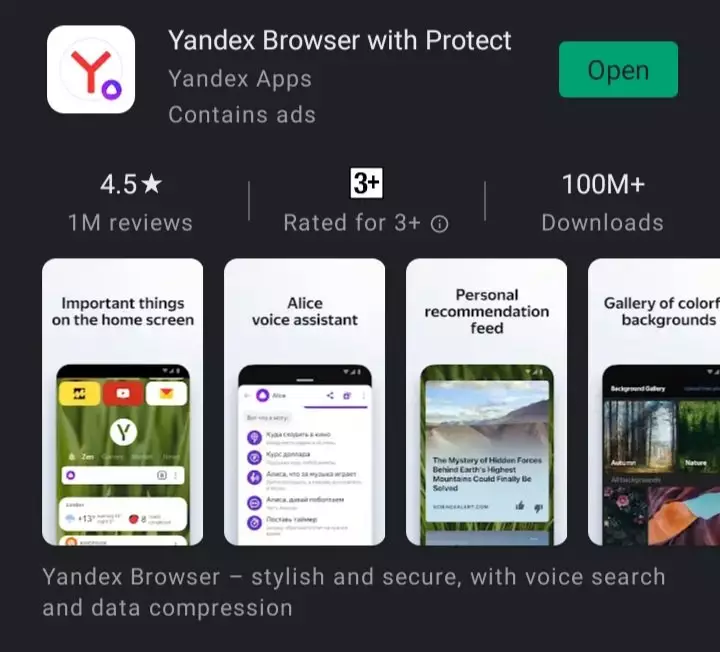
Download Yandex Browser from the App Store/Google Play Store.
Why Yandex? Experienced players recommend this browser for better gaming performance and speed.
Install the KardiaChain Wallet extension on Google Chrome
KardiaChain Wallet is a public blockchain platform focused on interoperability. We recommend using this when buying your MDP eggs instead of Binance Smart Chain (BSC), as it offers it’s users basically no transaction/gas fee.
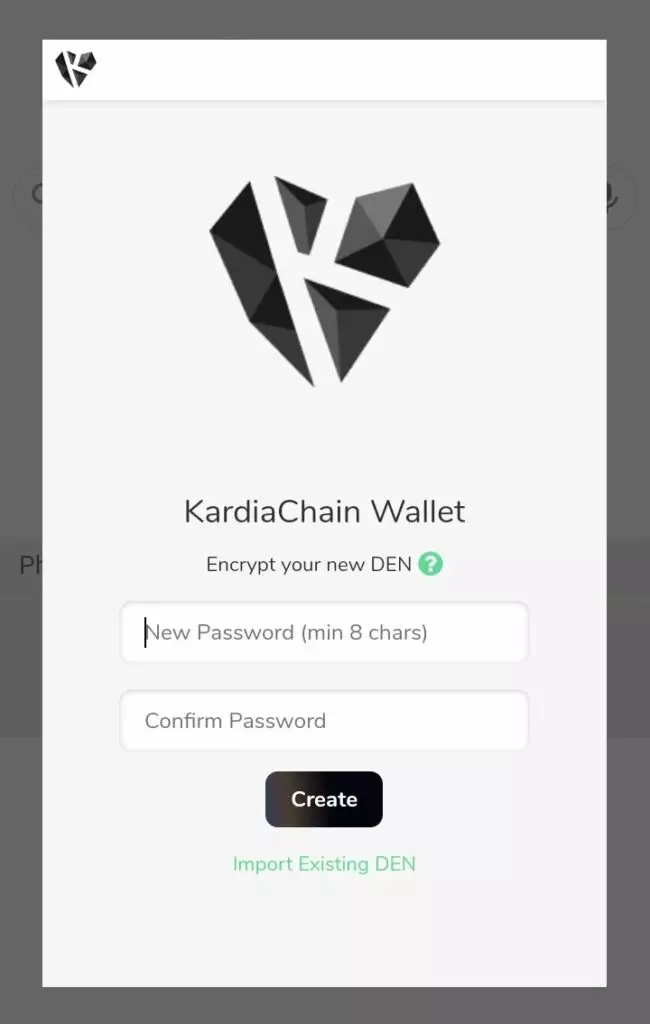
Create your account on KardiaChain Wallet
You will not see the KardiaChain Wallet on Yandex Browser’s homepage. To view your chrome extensions, add a new tab, click the 3 vertical dots on the right-hand part of your screen and then scroll down to see the puzzle logo. Click it and select the KardiaChain Wallet.
Create your password and confirm. The KardiaChain Wallet will provide your seed phrase. Secure it in a VERY safe place because it is important for your account recovery. Do not share it with anyone.
Create a Binance account and get it verified
Access Binance’s Beginners’ Guide here: https://academy.binance.com/en/articles/binance-beginner-s-guide
Create a Ronin Wallet and MetaMask extension on your Yandex Browser and create an account
Jump to Part 1, Step 1-4, of this article: https://p2enews.com/news/how-to-cash-out-of-axie-infinity/
3 options you can choose from when buying DPET tokens
- Buying DPET using KardiaChain Wallet
- Buying DPET directly from sellers (Direct send to your KardiaChain Wallet)
- Buying BNB in Binance and converting it to DPET using Pancake Swap
What is DPET?
DPET token is the native digital utility token of the MDP game, and it serves as the in-game currency. It is used for trading, exchanging, improving the Pets and their special qualities and more. DPET may also be spent by players to significantly enhance their progress and experience in-game.
TLDR: We recommend option number 1.
You should know that options 1 and 2 will require the use of your: (1)Verified Gcash; (2) MetaMask Account; (3) Ronin Wallet Account; and (4)Verified Binance account
GCash Tutorials
- To learn how to create a Gcash account, click here: https://help.gcash.com/hc/en-us/articles/900005866623-How-can-I-create-a-GCash
- To learn how to get it verified, click here: https://www.gcash.com/get-verified
Option 1: Buying DPET using KardiaChain Wallet
This option will be divided into 2 parts for a more comprehensive tutorial: Binance Process and Kucoin Process
Binance Process
- Go to Binance and buy USDT in P2P. Click that and select “Gcash”, click “Yes”, and it will filter the available sellers that use Gcash.
- Send USDT to Kucoin.
Download Kucoin Wallet in Google Play Store.
Sign up with your email and password. Get it verified. Go back to your Binance, go to Spot Wallet and click “USDT” and then “Withdrawal”.
Withdraw your USDT
From Kucoin, go to “Asset”, click “Deposit”, select USDT and “Continue”. Copy your USDT Address and paste it on your Binance withdrawal page under “Address”. Ensure the receiving network and the sending network are the same. Go back to your Kucoin page and this time, copy your Tag and paste to the Binance withdrawal page under “Tag”. Under “Amount” click “MAX” if you wish to withdraw all your USDT. Click “Withdrawal” and then “Confirm”. Kucoin will send codes to your phone number and email for verification. Enter the codes sent by Kucoin.
Kucoin Process
- Convert USDT to KAI: In your Kucoin, click Trade which is found on the lower part of the screen along with Home, Markets, Futures, and Assets. Click “Buy” and select KAI/USDT. Under “Limit”, select “Market”, then click 100%. Click “Buy KAI”.
- Transfer KAI from Trade Wallet to Main Wallet: From your Trade Wallet, click “Transfer”. Select “From Trading Account to Main Account”, click “All” then “Confirm”.
- Withdraw KAI to Kardia Chain Wallet: Go to your Kucoin, click “Assets”, select “KAI”, and click “Withdraw”, and “Continue”. Go to your KardiaChain Wallet and click “Receive”. Copy your Wallet Address and paste it to Kucoin withdrawal page under “Wallet address”. Click MAX if you wish to withdraw all your KAI. Click “Confirm”. Kucoin will ask for your Trading Password again and input the verification code and “Confirm”. Go to your KardiaChain Wallet and wait for a few minutes and refresh the page to see the credited KAI.
Convert KAI to DPET
In your KardiaChain Wallet, click “KAI Dex” which is found in the lower part of your screen. You will see the “Pairs” page. Select “DPET/KAI”. You will be redirected to the “Trade” page. Click 75% so you will have extra KAI intended for gas fees. Click “Buy DPET” and you are all done!
Option 2: Buying DPET directly from sellers
Buying DPET directly from the peer-to-peer market is the most convenient way to acquire these tokens, however it is also the most high-risk.
Where can I find sellers?
You can find sellers on My DeFi Pet Facebook Marketplace or from Twitter. For Filipinos, click here: https://www.facebook.com/groups/mydefipetmarketplacephilippines.
If you transact with the DPET seller, they will simply ask for your KardiaChain Wallet Address and your MDP Game Page screenshot (to verify your DPET balance before any official transaction). These private sellers typically prefer to use Gcash, so they will provide their Gcash name and number as your reference.
Sellers will usually request payment first. This is why private purchases tend to be riskier. With this in mind, it is essential for you to find a seller that you can trust.
Once you have sent your payment to the seller’s Gcash, screenshot the Gcash transaction and send it to him/her as proof of payment. Your seller would then send your purchased DPET tokens to your KardiaChain Wallet and you are all done.
Option 3: Buying BNB in Binance and converting it to DPET using Pancake Swap
Note: Make sure that you have more than enough ETH in your MetaMask for gas fees. If there are insuffiencient funds, the transaction will be unsuccessfull. We recommend $10 USD for gas fees.
Find a BNB seller in Binance that uses Gcash
Go to your Binance app, click “Trades”, then to “P2P”, and select “BNB”. On the upper right-hand side, you will see a filter logo. Click that and select “Gcash”, click “Yes”, and it will filter the available sellers that use Gcash.
Buy BNB
Enter the amount you will buy and click “Buy BNB”. DO NOT click “Transfer the Fund” yet. Chat with the seller first to ask and confirm his/her Gcash number. Once he provides his Gcash number, go to your Gcash and click “Send Money” then select “Express Send”. Enter the number of the seller and the amount of BNB you will buy. Screenshot the successful transaction and send it to the seller as proof. Go back to your Binance and you may now click “Transfer the Fund”. Check if the amounts displayed are all correct. If yes, then click “Transfer, next”. Chat with your seller again to confirm that you have transferred the BNB. Close the chat page and wait for the BNB to be released. It must pop up on your screen confirming that the BNB is deposited into your account. Click “Done”.
Transfer your BNB from P2P to Spot Wallet
Go to “Wallet” then click “P2P” and you will see your purchased BNB. Click it and then click “Transfer”. Make sure it is set up as “From P2P to Spot Wallet”. Click “MAX” if you wish to transfer all of your BNBs. Click “Transfer”. You will see that your BNB in your P2P is already 0.
Withdraw your BNB
Go to Spot and you will see the credited BNB. Click BNB and then select “Withdrawal”. You will see a page asking for Address, Network, and Amount; for Address, enter your MetaMask Address. The Network will automatically display. Click “MAX” for the Amount. Then click “Withdrawal” and “Confirm”. Binance will send a code in your phone and email. Submit and view history. From there, you can look after your transaction process which may take a few minutes.
Note: Double-check your MetaMask address to avoid sending your asset to a different recipient. To copy your MetaMask Address, just go to your MetaMask extension and then click “Account 1” on top of the screen. Your MetaMask address will be copied on the clipboard.
Important:
Avoid losing your BNB in MetaMask. Go to your MetaMask extension. Go to “Settings” and then go to “Networks”. It should be on Smart Chain (under RPC Networks) and not Ethereum Main Network, otherwise you will lose your BNB.
Add DPET as an asset in your MetaMask extension
In your MetaMask, click “Add Token” and select “Custom Token”. Paste the DPET contract address ( 0xfb62ae373aca027177d1c18ee0862817f9080d08 ) then click “Next”, then “Add Tokens”.
Convert BNB to DPET tokens
Go to Yandex Browser and add a new tab and search for Pancake Swap Exchange (hyperlink: exchange.pancakeswap.finance). You don’t have to create an account in Pancake Swap. Make sure to connect it to your MetaMask extension. On the Pancake Swap page under “From”, click MAX (leave a small amount if you wish). Under “To”, select currency and paste the DPET Contract Address seen above. Click “Swap” and then “Confirm”.
Go to your MetaMask Wallet extension and confirm the transaction. You will need some ETH for the gas fee. Wait for the transaction to be successful. Once successful, you will be good to go!
How to Purchase Eggs from My DeFi Pet?
Follow these 6 steps if you chose OPTION 1 or 2 (Using KardiaChain)
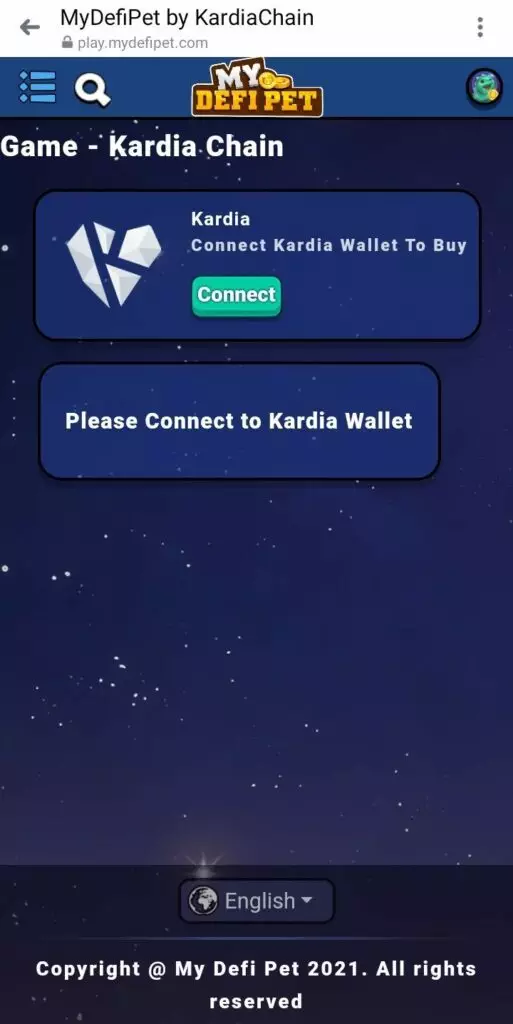
Go to My DeFi Pet Wallet Website
On your Yandex Browser, add a new tab, and enter https://mydefipet.com in the search bar. Click the burger menu icon on the upper right hand of the screen and click “Play Now”.

Click the “Game” button on the upper left hand of the screen and select “On KardiaChain”.
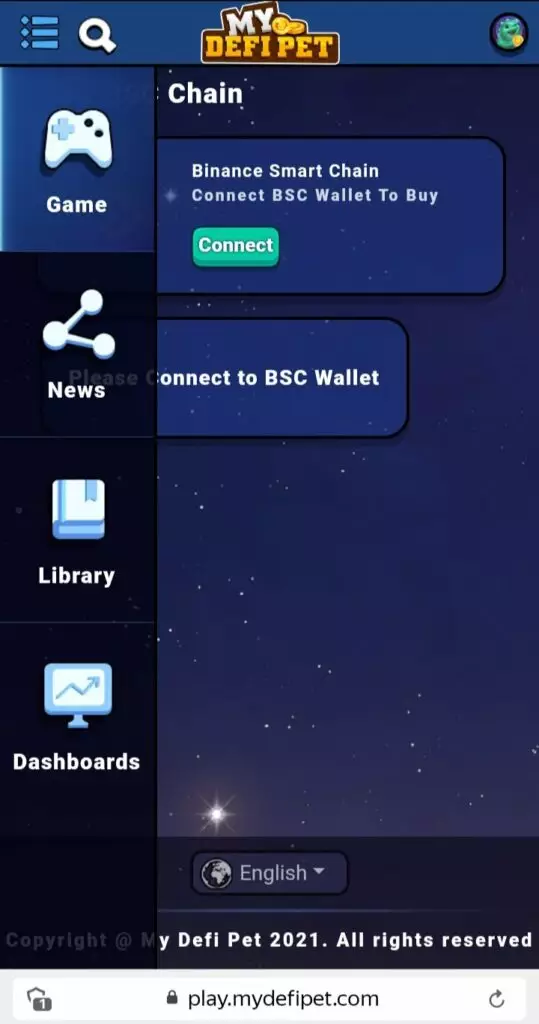
Click “Connect KardiaChain Wallet to Buy”
Make sure that your KardiaChain Wallet is “logged in” on your Yandex Browser. It will automatically connect to the My DeFi Pet game website.
The game page will appear under your KadiaChain Wallet address and DPET Tokens number. Refresh the page and rotate your phone in a landscape position to get a bigger view of the game. You can also play on your computer.
Go to “Shop” found on the left hand of your screen.
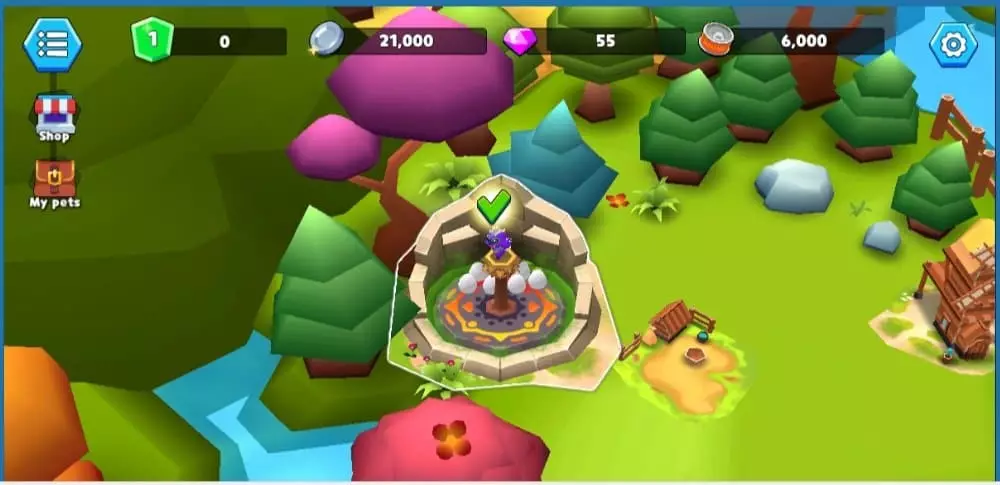
Buy your egg using your DPET tokens.
Click the green button below the egg. Each egg will cost 3 DPET tokens.
This must appear:
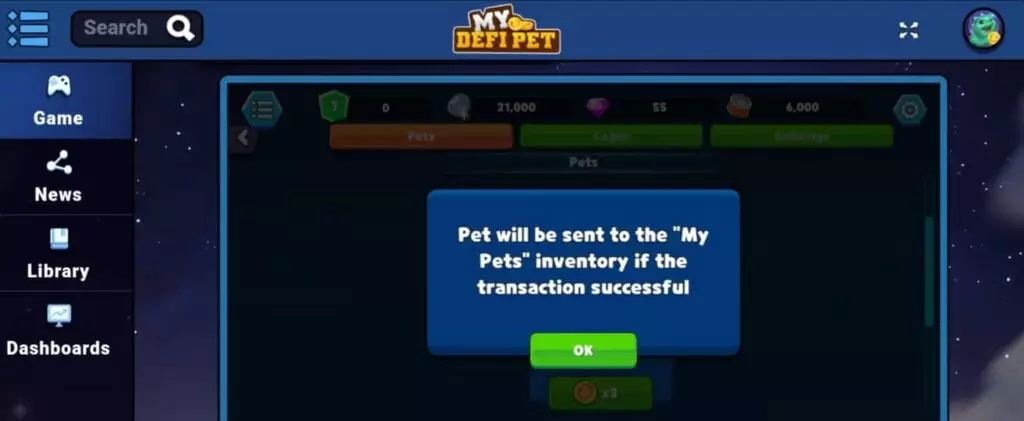
Go to your KardiaChain Wallet and confirm the transaction
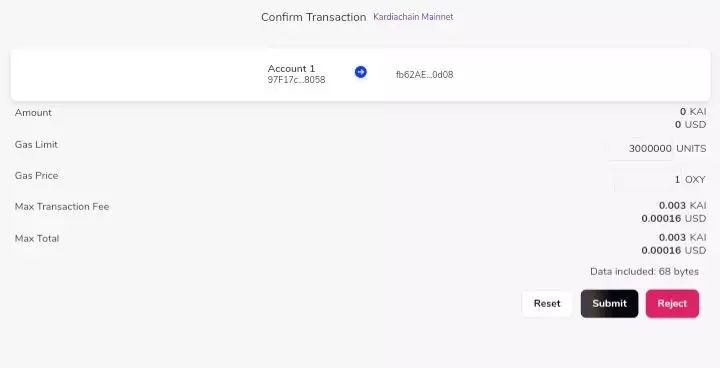
Click “Submit” and go back to your MDP Game page.
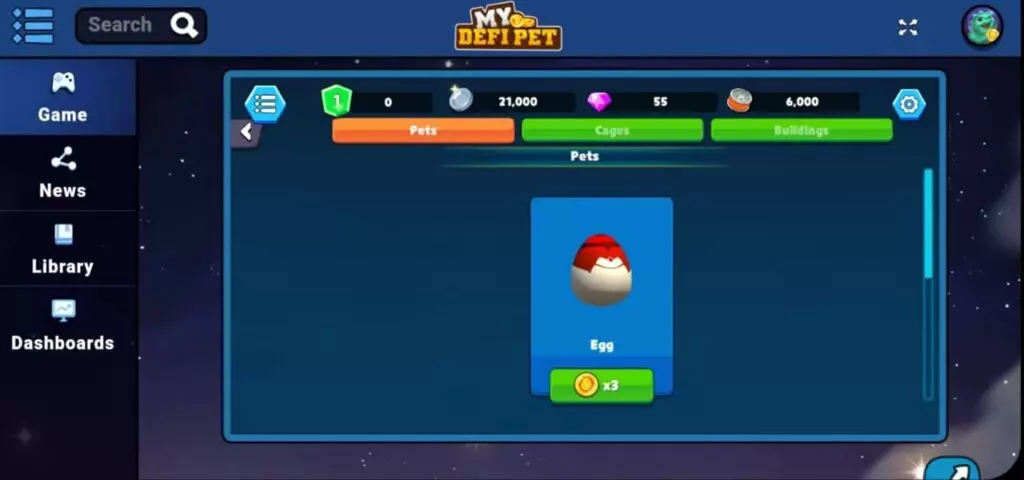
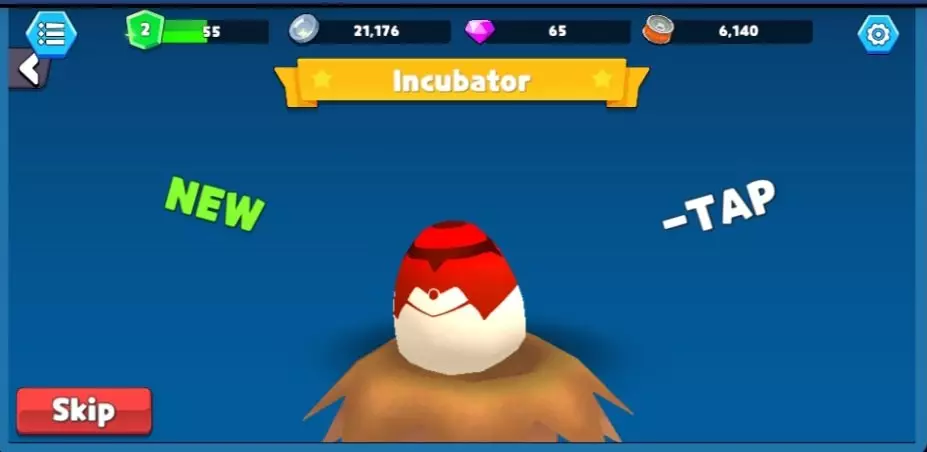
Go to “My Pets” and you will see your purchased pet
Note: Here you may see a little egg animation. It will look like this:
Repeat the process until you have purchased your desired number of pets.
If you chose Option 3
Follow the same steps for Option 1 and 2 except that on Step 2, choose “On BSC Chain” and on Step 5, go to your MetaMask extension to confirm the transaction.
How to Play My DeFi Pet?
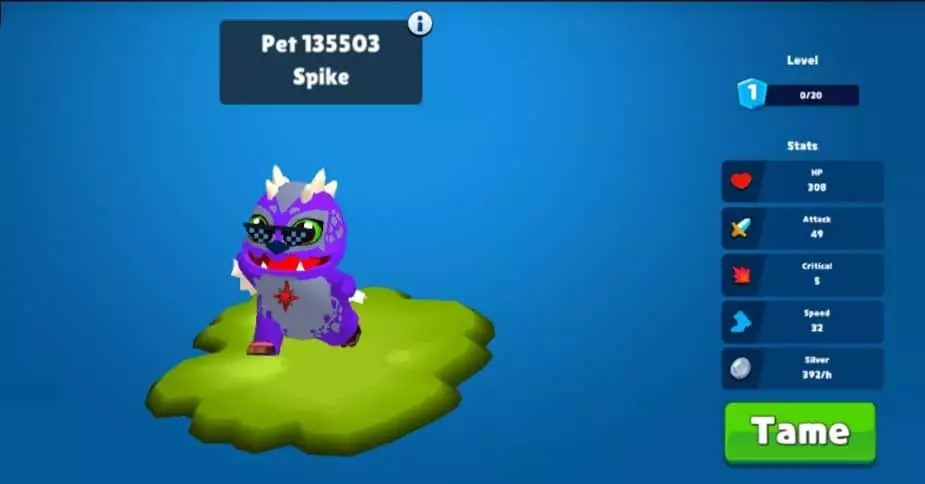
Tame your purchased pets
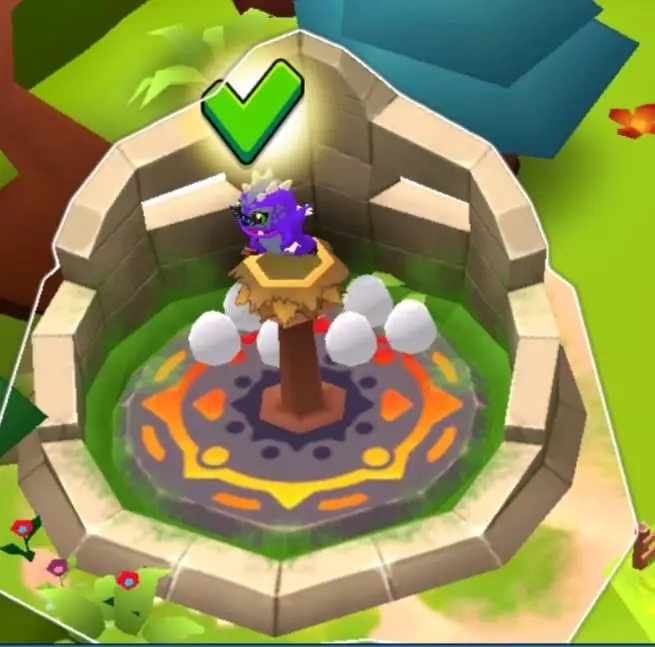
Go to “My Pets” and click on your pets. Click “Tame”. They will be placed in the incubator.
Drag your pets into the cage. Each cage can only house 3 pets. If you have more than 3 pets, you will need to buy another cage.
Plant to harvest food
Harvested food totals is shown next to the can-icon on the upper right of the screen.
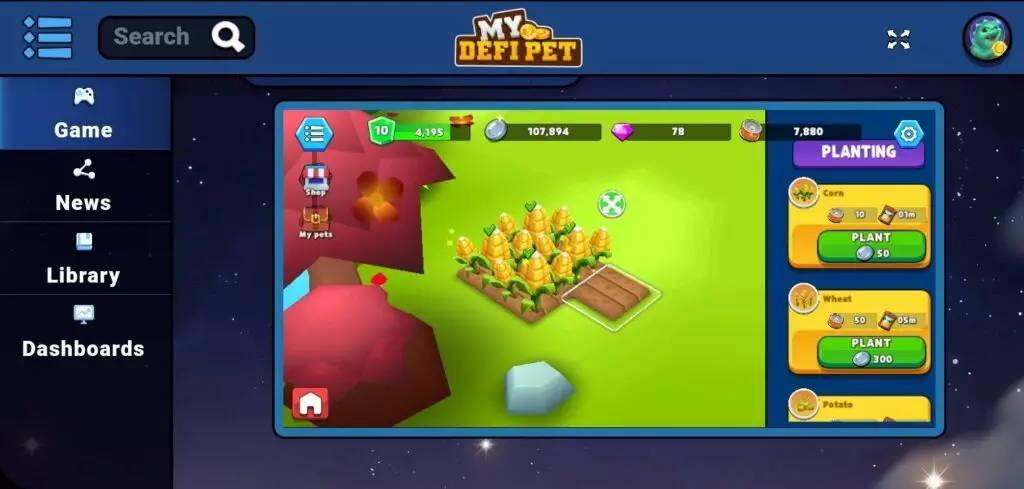
Feed the Pets
Feeding the pets will help them level up. You can also level up by planting and harvesting fruits.
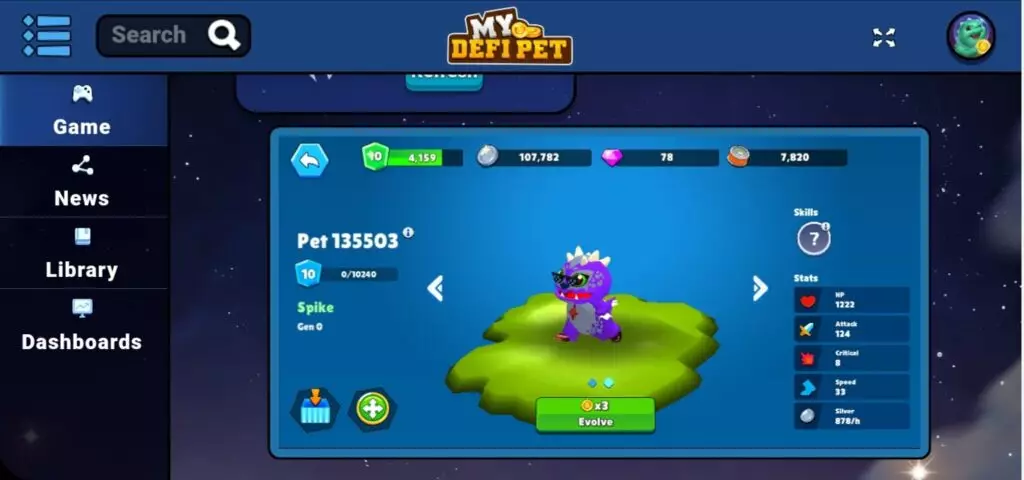
Once your pets have reached level 10, they can now be bred. It will cost 5 DPETs to breed your pets, or you could evolve them instead for 3 DPETs.
Stay updated and remember to follow us for more My Defi Pet tutorials and tips. Articles about Pet rarity and stats are coming soon! For now, choose your DPET buying method and don’t think twice – buy now and join in early on one of the most anticipated play-to-earn games!